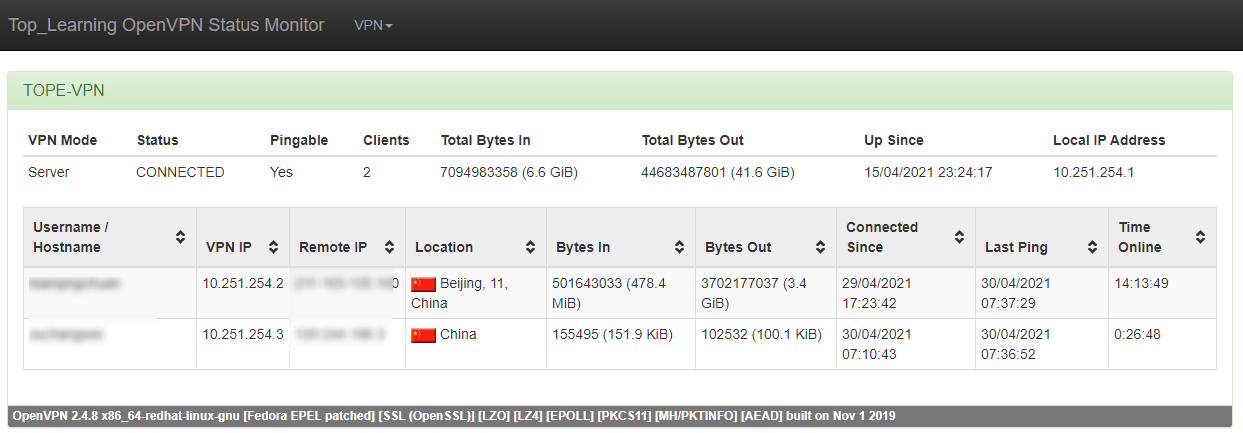
Linux: 企业级 VPN 服务 OpenVPN
- TAGS: Linux
本章内容
- OpenVPN 简介
- OpenVPN 部署
- OpenVPN 故障排错
- OpenVPN 高级功能
- 扩展知识
企业级VPN服务OpenVPN
1 OpenVPN简介
1.1 VPN 介绍
专用网:专用网就是在两个网络(例如,北京和广州)之间架设一条专用线路, 但是它并不需要真正地去铺设光缆之类的物理线路。虽然没有亲自去铺设,但是 需要向电信运营商申请租用专线,在这条专用的线路上只传输自己的信息,所以 安全稳定,同时也费用高昂
VPN:Virtual Private Network,虚拟私有网络,又称为虚拟专用网络,用于在 不安全的线路上安全的传输数据。

1.2 OpenVPN
OpenVPN:一个实现VPN的开源软件,OpenVPN 是一个健壮的、高度灵活的 VPN守 护进程。它支持SSL/TLS 安全、Ethernet bridging、经由代理的 TCP 或 UDP隧 道和 NAT。另外,它也支持动态 IP地址以及DHCP,可伸缩性足以支持数百或数 千用户的使用场景,同时可移植至大多数主流操作系统平台上。
GitHub地址:https://github.com/OpenVPN/openvpn
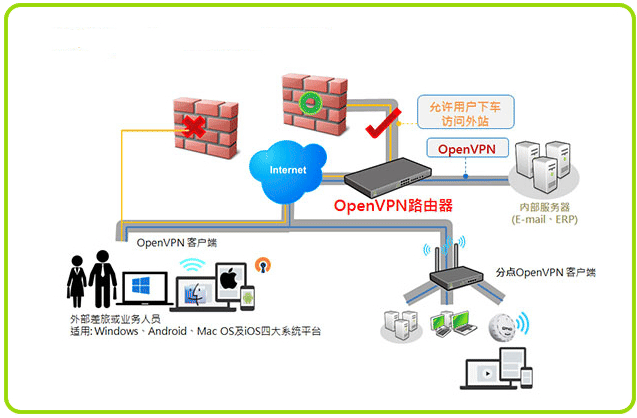
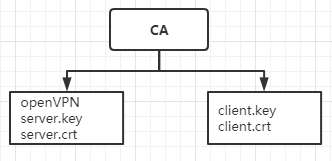
OpenVPN 示意图
2 OpenVPN 部署
2.1 准备 OpenVPN 部署环境
2.1.1 环境1: 阿里云OpenVPN 实战环境
准备阿里云网络实验环境
1 阿里云创建专有网络
指定城市和可用区
网段名称net1和地址段172.16.0.0/12
交换机名称net1-sw1 可用区A IPv4地址段172.30.0.0/24
阿里云设置安全组规则允许所有ip能连接1194端口
安全组开放22端口
2 创建openvpn服务器有公网IP的实例1个
3 创建局域网的服务器无公网IP的实例2个
4 重设所有实例密码
5 修改安全组打开 1194/tcp/udp端口
准备完成的实例环境

俩台内网web服务器可以不设置网关
防火墙规则配置

2.1.2 环境2: 局域网 OpenVPN 实战环境
共四台主机
1 openvpn server:
CentOS 8.2
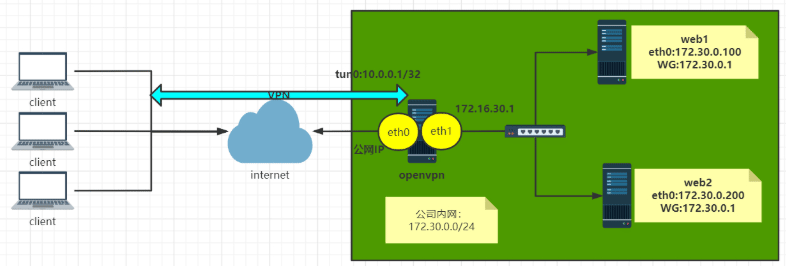
eth0:10.0.0.8/24 NAT模式,模拟公网IP
eth1:172.30.0.1/24 仅主机模式,私网IP
2 内网主机两台
第一台主机
eth0:172.30.0.100/24 仅主机模式,私网IP,无需网关
第二台主机
eth0:172.30.0.200/24 仅主机模式,私网IP,无需网关
3 Windows 客户端
Windows 10
2.2 安装OpenVPN软件包
2.1.1 查看版本
查看官网的OpenVPN的版本
访问官网:https://openvpn.net
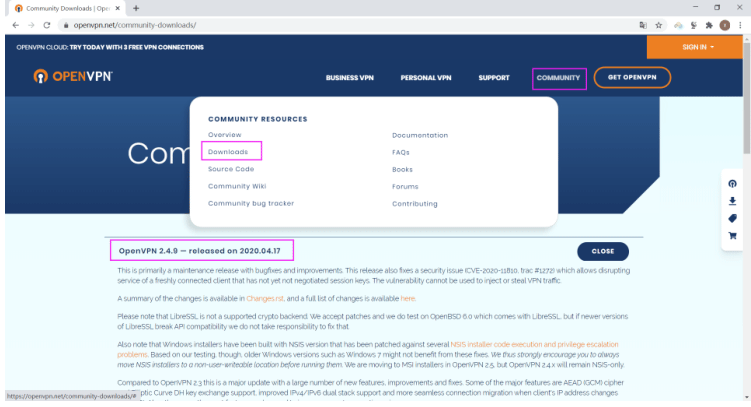
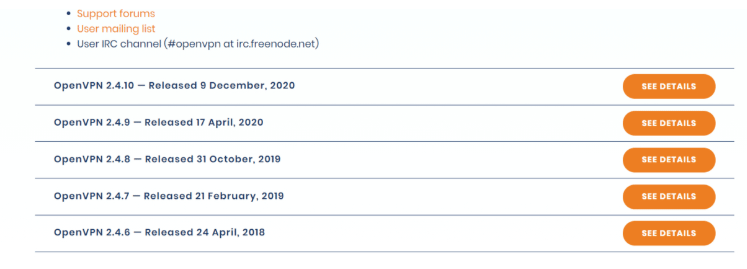
在不同OS上查看OpenVPN版本
CentOS系统上的EPEL源OpenVPN版本比Ubuntu的仓库中版本更新,以下选择在 CentOS8上部署OpenVPN
范例: CentOS 查看OpenVPN版本
[11:58:01 root@openvpn-server ~]#yum list openvpn
openvpn.x86_64                                    2.4.10-1.el8                                     epel
[12:03:21 root@openvpn-server ~]#yum list easy-rsa
easy-rsa.noarch                                    3.0.8-1.el8                                     epel
范例: Ubuntu1804 查看OpenVPN版本
[root@ubuntu1804 ~]#apt list openvpn
openvpn/bionic-proposed 2.4.4-2ubuntu1.4 amd64
N: There are 2 additional versions. Please use the '-a' switch to see the
[root@ubuntu1804 ~]#apt-cache madison openvpn
[root@ubuntu1804 ~]#apt-cache madison easy-rsa
2.1.2 安装OpenVPN
安装OpenVPN和证书工具
#OpenVPN服务器端
[12:03:52 root@openvpn-server ~]#yum install -y openvpn
#证书管理工具,签发服务端和客户端证书
[12:05:19 root@openvpn-server ~]#yum install -y easy-rsa
2.1.3 查看包中相关文件
[12:06:00 root@openvpn-server ~]#rpm -ql openvpn
/etc/openvpn/client  # 客户端配置文件
/etc/openvpn/server  # server配置文件
/usr/lib/systemd/system/[email protected]
/usr/lib/systemd/system/[email protected]     # server启动脚本
/usr/sbin/openvpn
/usr/share/doc/openvpn/sample/sample-config-files/client.conf  # 模板,客户端配置
/usr/share/doc/openvpn/sample/sample-config-files/server.conf  # 模板,服务端配置
/var/lib/openvpn

[12:06:08 root@openvpn-server ~]#rpm -ql easy-rsa
/usr/share/doc/easy-rsa/vars.example         # 变量配置文件,用于配置证书有效性
/usr/share/easy-rsa/3
/usr/share/easy-rsa/3.0.8/easyrsa            # 签发证书的程序
2.2.2 准备相关配置文件
#生成服务器配置文件
cp /usr/share/doc/openvpn/sample/sample-config-files/server.conf /etc/openvpn/
#准备证书签发相关文件
cp -r /usr/share/easy-rsa/ /etc/openvpn/easy-rsa-server
#准备签发证书相关变量的配置文件
cp /usr/share/doc/easy-rsa/vars.example /etc/openvpn/easy-rsa-server/3/vars    # 文件名vars

#建议修改给CA和OpenVPN服务器颁发的证书的有效期,可适当加长
[root@openvpn-server ~]#vim /etc/openvpn/easy-rsa-server/3/vars
#CA的证书有效期默为为10年,可以适当延长,比如:100年
#set_var EASYRSA_CA_EXPIRE  3650
set_var EASYRSA_CA_EXPIRE   36500
#服务器证书默为为825天,可适当加长,比如:3650天
#set_var EASYRSA_CERT_EXPIRE    825
set_var EASYRSA_CERT_EXPIRE 3650

[root@openvpn-server ~]#tree /etc/openvpn/
/etc/openvpn/
├── client
├── easy-rsa-server
│   ├── 3 -> 3.0.8
│   ├── 3.0 -> 3.0.8
│   └── 3.0.8
│       ├── easyrsa
│       ├── openssl-easyrsa.cnf
│       ├── vars
│       └── x509-types
│           ├── ca
│           ├── client
│           ├── code-signing
│           ├── COMMON
│           ├── email
│           ├── kdc
│           ├── server
│           └── serverClient
├── server
└── server.conf
2.3 准备证书相关文件
2.3.1 初始化PKI和CA签发机构环境
- 2.1.4 脚本easyrsa帮助用法
[root@openvpn-server ~]#cd /etc/openvpn/easy-rsa-server/3
[root@openvpn-server 3]#file ./easyrsa
./easyrsa: POSIX shell script, ASCII text executable
[root@openvpn-server 3]#./easyrsa
USAGE: easyrsa [options] COMMAND [command-options]

A list of commands is shown below. To get detailed usage and help for a
command, run:
  ./easyrsa help COMMAND

For a listing of options that can be supplied before the command, use:
  ./easyrsa help options

Here is the list of commands available with a short syntax reminder. Use the
'help' command above to get full usage details.
  init-pki                                         # 初始化数据,在当前目录下生成pki目录及相关文件,同时会读取当前目录的vars文件
  build-ca [ cmd-opts ]                            # 创建CA证书  不使用密码添加 nopass 参数
  gen-dh                                           # 创建Diifie-Hellman密钥
  gen-req <filename_base> [ cmd-opts ]             # 生成证书
  sign-req <type> <filename_base>                  # 颁发证书
  build-client-full <filename_base> [ cmd-opts ]
  build-server-full <filename_base> [ cmd-opts ]
  revoke <filename_base> [cmd-opts]
  renew <filename_base> [cmd-opts]
  build-serverClient-full <filename_base> [ cmd-opts ]
  gen-crl
  update-db
  show-req <filename_base> [ cmd-opts ]
  show-cert <filename_base> [ cmd-opts ]
  show-ca [ cmd-opts ]
  import-req <request_file_path> <short_basename>  # 导入证书请求文件
  export-p7 <filename_base> [ cmd-opts ]
  export-p8 <filename_base> [ cmd-opts ]
  export-p12 <filename_base> [ cmd-opts ]
  set-rsa-pass <filename_base> [ cmd-opts ]
  set-ec-pass <filename_base> [ cmd-opts ]
  upgrade <type>

./easyrsa init-pki         #初始化数据,在当前目录下生成pki目录及相关文件,同时会读取当前目录的vars文件
./easyrsa build-ca nopass  # 创建CA证书,不带密码,一路回车
    #/etc/openvpn/easy-rsa-server/3/pki/ca.crt

./easyrsa gen-req server nopass  # 生成服务端证书,不使用密码
    #req: /etc/openvpn/easy-rsa-server/3/pki/reqs/server.req     #生成的申请文件
    #key: /etc/openvpn/easy-rsa-server/3/pki/private/server.key  #生成的私钥文件

./easyrsa gen-req client-x nopass # 生客户端证书,不使用密码
    #req: /etc/openvpn/easy-rsa-client/3/pki/reqs/client-x.req       #申请证书文件
    #key: /etc/openvpn/easy-rsa-client/3/pki/private/client-x.key    #私钥文件

./easyrsa import-req /etc/openvpn/easy-rsa-client/3/pki/reqs/client-x.req client-x # 导入客户端证书请求文件到CA的工作目录,让CA能识别到这个请求文件
./easyrsa sign server server #签发服务端证书
    #/etc/openvpn/easy-rsa-server/3/pki/issued/server.crt
./easyrsa sign client client-x #签发客户端证书
    #/etc/openvpn/easy-rsa-server/3/pki/issued/client-x.crt
#创建Diffie-Hellman密钥
#方法1
./easyrsa gen-dh
    #/etc/openvpn/easy-rsa-server/3/pki/dh.pem
#方法2
openssl dhparam -out /root/dh2048.pem 2048
- 初始化PKI生成PKI相关目录和文件
cd /etc/openvpn/easy-rsa-server/3
#初始化数据,在当前目录下生成pki目录及相关文件,同时会读取当前目录的vars文件
./easyrsa init-pki


[root@openvpn-server 3]#tree -F
.
├── easyrsa*
├── openssl-easyrsa.cnf
├── pki/
│   ├── openssl-easyrsa.cnf
│   ├── private/            # 私钥存储位置
│   ├── reqs/               # 请求文件存储位置
│   └── safessl-easyrsa.cnf
├── vars
└── x509-types/
    ├── ca
    ├── client
    ├── code-signing
    ├── COMMON
    ├── email
    ├── kdc
    ├── server
    └── serverClient
2.3.2 创建CA机构
cd /etc/openvpn/easy-rsa-server/3

[root@openvpn-server 3]#./easyrsa build-ca nopass  # 创建CA证书,不带密码,一路回车 。加 --batch 不需要回车

Note: using Easy-RSA configuration from: /etc/openvpn/easy-rsa-server/3.0.8/vars
Using SSL: openssl OpenSSL 1.1.1g FIPS  21 Apr 2020
Generating RSA private key, 2048 bit long modulus (2 primes)
...................................................................................................................................................................................................+++++
....................................................................+++++
e is 65537 (0x010001)
You are about to be asked to enter information that will be incorporated
into your certificate request.
What you are about to enter is what is called a Distinguished Name or a DN.
There are quite a few fields but you can leave some blank
For some fields there will be a default value,
If you enter '.', the field will be left blank.
-----------------------------------------------

Common Name (eg: your user, host, or server name) [Easy-RSA CA]:  #接受默认值,直接回车

CA creation complete and you may now import and sign cert requests.
Your new CA certificate file for publishing is at:
/etc/openvpn/easy-rsa-server/3/pki/ca.crt    #生成自签名的证书文件

[root@openvpn-server 3]#tree pki/
pki/
├── ca.crt              #生成自签名的证书文件
├── certs_by_serial
├── index.txt
├── index.txt.attr
├── issued
├── openssl-easyrsa.cnf
├── private
│   └── ca.key         #生成私钥文件
├── renewed
│   ├── certs_by_serial
│   ├── private_by_serial
│   └── reqs_by_serial
├── reqs
├── revoked
│   ├── certs_by_serial
│   ├── private_by_serial
│   └── reqs_by_serial
├── safessl-easyrsa.cnf
└── serial

#查看一下生成CA相关的文件
[root@openvpn-server 3]#cat pki/serial
01
[root@openvpn-server 3]#ll pki/index.txt
-rw------- 1 root root 0 Jan 26 12:17 pki/index.txt
[root@openvpn-server 3]#ll pki/ca.crt pki/private/ca.key
-rw------- 1 root root 1204 Jan 26 12:17 pki/ca.crt
-rw------- 1 root root 1679 Jan 26 12:17 pki/private/ca.key
[root@openvpn-server 3]#cat pki/ca.crt
[root@openvpn-server 3]#openssl x509 -in pki/ca.crt -noout -text
2.3.3 创建服务端证书申请
#创建服务器证书申请文件,其中server是文件前缀
cd /etc/openvpn/easy-rsa-server/3
[root@openvpn-server 3]#./easyrsa gen-req server nopass  # 生成服务端证书,不使用密码

Note: using Easy-RSA configuration from: /etc/openvpn/easy-rsa-server/3.0.8/vars
Using SSL: openssl OpenSSL 1.1.1g FIPS  21 Apr 2020
Generating a RSA private key
writing new private key to '/etc/openvpn/easy-rsa-server/3/pki/easy-rsa-11496.syBWUN/tmp.KB9HvC'
------------------------------------------------------------------------------------------------

You are about to be asked to enter information that will be incorporated
into your certificate request.
What you are about to enter is what is called a Distinguished Name or a DN.
There are quite a few fields but you can leave some blank
For some fields there will be a default value,
If you enter '.', the field will be left blank.
-----------------------------------------------

Common Name (eg: your user, host, or server name) [server]:   接受Common Name,可以使用默认

Keypair and certificate request completed. Your files are:
req: /etc/openvpn/easy-rsa-server/3/pki/reqs/server.req     #生成的申请文件
key: /etc/openvpn/easy-rsa-server/3/pki/private/server.key  #生成的私钥文件

[12:29:17 root@openvpn-server 3]#tree pki/
pki/
├── ca.crt
├── certs_by_serial
├── index.txt
├── index.txt.attr
├── issued
├── openssl-easyrsa.cnf
├── private
│   ├── ca.key
│   └── server.key   #私钥文件
├── renewed
│   ├── certs_by_serial
│   ├── private_by_serial
│   └── reqs_by_serial
├── reqs
│   └── server.req  #申请文件
├── revoked
│   ├── certs_by_serial
│   ├── private_by_serial
│   └── reqs_by_serial
├── safessl-easyrsa.cnf
└── serial
2.3.4 签发服务端证书
查看颁发证书命令用法
cd /etc/openvpn/easy-rsa-server/3
[root@openvpn-server 3]#./easyrsa help sign

Note: using Easy-RSA configuration from: /etc/openvpn/easy-rsa-server/3.0.8/vars

sign-req
Sign a certificate request of the defined type.  must be a known
type such as 'client', 'server', 'serverClient', or 'ca' (or a user-added type.)

This request file must exist in the reqs/ dir and have a .req file
extension. See import-req below for importing reqs from other sources.
颁发服务端证书
#将上面server.req的申请,颁发server类型的证书
cd /etc/openvpn/easy-rsa-server/3
[root@openvpn-server 3]#./easyrsa sign server server #签发服务端证书

Note: using Easy-RSA configuration from: /etc/openvpn/easy-rsa-server/3.0.8/vars
Using SSL: openssl OpenSSL 1.1.1g FIPS  21 Apr 2020

You are about to sign the following certificate.
Please check over the details shown below for accuracy. Note that this request
has not been cryptographically verified. Please be sure it came from a trusted
source or that you have verified the request checksum with the sender.

Request subject, to be signed as a server certificate for 3650 days: #可以看到vars文件指定的有效期

subject=
commonName                = server

Type the word 'yes' to continue, or any other input to abort.
Confirm request details: yes  #输入yes回车
Using configuration from /etc/openvpn/easy-rsa-server/3/pki/easy-rsa-11533.UjZ9m9/tmp.xGm4NL
Check that the request matches the signature
Signature ok
The Subject's Distinguished Name is as follows
commonName            :ASN.1 12:'server'
Certificate is to be certified until Jan 24 04:31:32 2031 GMT (3650 days)

Write out database with 1 new entries
Data Base Updated

Certificate created at: /etc/openvpn/easy-rsa-server/3/pki/issued/server.crt
#生成服务器证书文件
验证结果
[root@openvpn-server 3]#cd /etc/openvpn/easy-rsa-server/3
[root@openvpn-server 3]#tree pki/
pki/
├── ca.crt
├── certs_by_serial
│   └── 5D3B930AA9D6B0AF69E65FA76C6251C4.pem   #服务器证书文件
├── index.txt
├── index.txt.attr
├── index.txt.attr.old
├── index.txt.old
├── issued
│   └── server.crt          #服务器证书文件
├── openssl-easyrsa.cnf
├── private
│   ├── ca.key
│   └── server.key
├── renewed
│   ├── certs_by_serial
│   ├── private_by_serial
│   └── reqs_by_serial
├── reqs
│   └── server.req
├── revoked
│   ├── certs_by_serial
│   ├── private_by_serial
│   └── reqs_by_serial
├── safessl-easyrsa.cnf
├── serial
└── serial.old

[root@openvpn-server 3]#diff pki/certs_by_serial/5D3B930AA9D6B0AF69E65FA76C6251C4.pem pki/issued/server.crt
[root@openvpn-server 3]#ll !*
ll pki/certs_by_serial/5D3B930AA9D6B0AF69E65FA76C6251C4.pem pki/issued/server.crt
-rw------- 1 root root 4608 Jan 26 12:31 pki/certs_by_serial/5D3B930AA9D6B0AF69E65FA76C6251C4.pem
-rw------- 1 root root 4608 Jan 26 12:31 pki/issued/server.crt

#证书相关文件
[root@openvpn-server 3]#cat pki/serial
5D3B930AA9D6B0AF69E65FA76C6251C5
[12:35:09 root@openvpn-server 3]#cat pki/index.txt
V   310124043132Z       5D3B930AA9D6B0AF69E65FA76C6251C4    unknown /CN=server
[root@openvpn-server 3]#cat pki/serial.old
5d3b930aa9d6b0af69e65fa76c6251c4
2.3.5 创建Diifie-Hellman密钥
Diffie-Hellman 算法
Diffie-Hellman 密钥交换方法,由惠特菲尔德·迪菲(Bailey Whitfield Diffie)、马丁·赫尔曼(Martin Edward Hellman)于1976年发表。它是一种安全协议,让双方在完全没有对方任何预先信息的条件下通过不安全信道建立起一个密钥,这个密钥一般作为“对称加密”的密钥而被双方在后续数据传输中使用。DH数学原理是base离散对数问题。做类似功能的还有非对称加密类算法,如:RSA。其应用非常广泛,在SSH、VPN、Https等都有应用。
wiki参考链接: https://en.wikipedia.org/wiki/Diffie%E2%80%93Hellman_key_exchange
创建Diffie-Hellman密钥
cd /etc/openvpn/easy-rsa-server/3

#创建Diffie-Hellman密钥
#方法1
[root@openvpn-server 3]#./easyrsa gen-dh

Note: using Easy-RSA configuration from: /etc/openvpn/easy-rsa-server/3.0.8/vars
Using SSL: openssl OpenSSL 1.1.1g FIPS  21 Apr 2020
Generating DH parameters, 2048 bit long safe prime, generator 2
This is going to take a long time
...................+  #需要等一会
DH parameters of size 2048 created at /etc/openvpn/easy-rsa-server/3/pki/dh.pem
#查看生成的文件
[root@openvpn-server 3]#ll pki/dh.pem
-rw------- 1 root root 424 Jan 26 12:37 pki/dh.pem
[root@openvpn-server 3]#cat pki/dh.pem
-----BEGIN DH PARAMETERS-----
MIIBCAKCAQEAypLcHbOieMk67cANDM+IBDD0w6SP3vJ9vY4Bz58SX017qLI9qLSD
CCRWIF7Y57zVHkqrXHsVJpSXZPBGTWPKg6LsMYrSrQctxajikAzkA2xqlezJquFz
oGkhR9P1xkA7Kbj0+w0/0lOxkPuVq6WbqSa2JBNaYmOzXRz1I4BZnR0CCKoI/WMB
WZ2cTeQcVI1AYqN9prOwWZwXZks420RUmnDXAL7BtvfElyKtgiZXPzQpiF4Psjhb
gNAwBnHJiV1vj1dTLg6CtU9e+yuk7nuz+74OhF3y2jfF3odg+7ZGWNlkoMP1wq6Z
eONjJO9n3cxLInPXDhJ4NfbwTh6LOKQ6YwIBAg==
-----END DH PARAMETERS-----
#方法2
[root@openvpn-server 3]#openssl dhparam -out /root/dh2048.pem 2048
2.3.6 准备客户端证书环境
上面服务端证书配置完成,下面是配置客户端证书。方便管理才分开位置,不分也可以的。
cp -r /usr/share/easy-rsa/ /etc/openvpn/easy-rsa-client

#可选
cp /usr/share/doc/easy-rsa/vars.example /etc/openvpn/easy-rsa-client/3/vars

cd /etc/openvpn/easy-rsa-client/3

#初始化数据,在当前目录下生成pki目录及相关文件,同时会读取当前目录的vars文件
./easyrsa init-pki
#生成证书申请所需目录pki和文件
[root@openvpn-server 3]#tree
.
├── easyrsa
├── openssl-easyrsa.cnf
├── pki
│   ├── openssl-easyrsa.cnf
│   ├── private
│   ├── reqs
│   └── safessl-easyrsa.cnf
├── vars
└── x509-types
├── ca
├── client
├── code-signing
├── COMMON
├── email
├── kdc
├── server
└── serverClient

4 directories, 13 files
2.3.7 创建客户端证书申请
[root@openvpn-server 3]#cd /etc/openvpn/easy-rsa-client/3
[root@openvpn-server 3]#pwd
/etc/openvpn/easy-rsa-client/3

#生成客户端用户的证书申请
[root@openvpn-server 3]#./easyrsa gen-req client-x nopass

Note: using Easy-RSA configuration from: /etc/openvpn/easy-rsa-client/3.0.8/vars
Using SSL: openssl OpenSSL 1.1.1g FIPS  21 Apr 2020
Generating a RSA private key
....+++++
......+++++
writing new private key to '/etc/openvpn/easy-rsa-client/3/pki/easy-rsa-11853.FRpJUj/tmp.Jr13E6'
------------------------------------------------------------------------------------------------

You are about to be asked to enter information that will be incorporated
into your certificate request.
What you are about to enter is what is called a Distinguished Name or a DN.
There are quite a few fields but you can leave some blank
For some fields there will be a default value,
If you enter '.', the field will be left blank.
-----------------------------------------------

Common Name (eg: your user, host, or server name) [client-x]:  #接受默认回车

Keypair and certificate request completed. Your files are:
req: /etc/openvpn/easy-rsa-client/3/pki/reqs/client-x.req       #申请证书文件
key: /etc/openvpn/easy-rsa-client/3/pki/private/client-x.key    #私钥文件

#生成两个新文件
[root@openvpn-server 3]#tree
.
├── easyrsa
├── openssl-easyrsa.cnf
├── pki
│   ├── openssl-easyrsa.cnf
│   ├── private
│   │   └── client-x.key
│   ├── reqs
│   │   └── client-x.req
│   └── safessl-easyrsa.cnf
├── vars
└── x509-types
├── ca
├── client
├── code-signing
├── COMMON
├── email
├── kdc
├── server
└── serverClient
2.3.8 签发客户端证书
[root@openvpn-server 3]#cd /etc/openvpn/easy-rsa-server/3
[root@openvpn-server 3]#pwd
/etc/openvpn/easy-rsa-server/3

#导入客户端证书请求文件到CA的工作目录,让CA能识别到这个请求文件
[root@openvpn-server 3]#./easyrsa import-req /etc/openvpn/easy-rsa-client/3/pki/reqs/client-x.req client-x

Note: using Easy-RSA configuration from: /etc/openvpn/easy-rsa-server/3.0.8/vars
Using SSL: openssl OpenSSL 1.1.1g FIPS  21 Apr 2020

The request has been successfully imported with a short name of: client-x
You may now use this name to perform signing operations on this request.

[root@openvpn-server 3]#tree pki/
pki/
├── ca.crt
├── certs_by_serial
│   └── 5D3B930AA9D6B0AF69E65FA76C6251C4.pem
├── dh.pem
├── index.txt
├── index.txt.attr
├── index.txt.attr.old
├── index.txt.old
├── issued
│   └── server.crt
├── openssl-easyrsa.cnf
├── private
│   ├── ca.key
│   └── server.key
├── renewed
│   ├── certs_by_serial
│   ├── private_by_serial
│   └── reqs_by_serial
├── reqs
│   ├── server.req
│   └── client-x.req    #导入的文件
├── revoked
│   ├── certs_by_serial
│   ├── private_by_serial
│   └── reqs_by_serial
├── safessl-easyrsa.cnf
├── serial
└── serial.old

[root@openvpn-server 3]#ll pki/reqs/client-x.req /etc/openvpn/easy-rsa-client/3/pki/reqs/client-x.req
-rw------- 1 root root 891 Jan 26 13:53 /etc/openvpn/easy-rsa-client/3/pki/reqs/client-x.req
-rw------- 1 root root 891 Jan 26 13:55 pki/reqs/client-x.req

#修改给客户端颁发的证书的有效期
[root@openvpn-server 3]#vim vars
#建议修改给客户端颁发证书的有效期,可适当减少,比如:90天
set_var EASYRSA_CERT_EXPIRE 180    #修改之前的3650为180

#签发客户端证书
[root@openvpn-server 3]#./easyrsa sign client client-x

Note: using Easy-RSA configuration from: /etc/openvpn/easy-rsa-server/3.0.8/vars
Using SSL: openssl OpenSSL 1.1.1g FIPS  21 Apr 2020

You are about to sign the following certificate.
Please check over the details shown below for accuracy. Note that this request
has not been cryptographically verified. Please be sure it came from a trusted
source or that you have verified the request checksum with the sender.

Request subject, to be signed as a client certificate for 180 days:

subject=
commonName                = client-x

Type the word 'yes' to continue, or any other input to abort.
Confirm request details: yes    #输入yes后回车
Using configuration from /etc/openvpn/easy-rsa-server/3/pki/easy-rsa-11993.LhxZXn/tmp.Fl00WC
Check that the request matches the signature
Signature ok
The Subject's Distinguished Name is as follows
commonName            :ASN.1 12:'client-x'
Certificate is to be certified until Jul 25 05:59:46 2021 GMT (180 days)

Write out database with 1 new entries
Data Base Updated

Certificate created at: /etc/openvpn/easy-rsa-server/3/pki/issued/client-x.crt
#证书文件

[root@openvpn-server 3]#tree pki/
pki/
├── ca.crt
├── certs_by_serial
│   ├── 5D3B930AA9D6B0AF69E65FA76C6251C4.pem
│   └── 8EB7E418B1FE1715BCBB73A513498893.pem
├── dh.pem
├── index.txt
├── index.txt.attr
├── index.txt.attr.old
├── index.txt.old
├── issued
│   ├── server.crt
│   └── client-x.crt     #生成客户端证书
├── openssl-easyrsa.cnf
├── private
│   ├── ca.key
│   └── server.key
├── renewed
│   ├── certs_by_serial
│   ├── private_by_serial
│   └── reqs_by_serial
├── reqs
│   ├── server.req
│   └── client-x.req
├── revoked
│   ├── certs_by_serial
│   ├── private_by_serial
│   └── reqs_by_serial
├── safessl-easyrsa.cnf
├── serial
└── serial.old

[root@openvpn-server 3]#cat pki/index.txt
V   310124043132Z       5D3B930AA9D6B0AF69E65FA76C6251C4    unknown /CN=server
V   210725055946Z       8EB7E418B1FE1715BCBB73A513498893    unknown /CN=client-x
[root@openvpn-server 3]#ll pki/issued/
total 16
-rw------- 1 root root 4608 Jan 26 12:31 server.crt
-rw------- 1 root root 4499 Jan 26 13:59 client-x.crt
[root@openvpn-server 3]#ll pki/certs_by_serial/
total 16
-rw------- 1 root root 4608 Jan 26 12:31 5D3B930AA9D6B0AF69E65FA76C6251C4.pem
-rw------- 1 root root 4499 Jan 26 13:59 8EB7E418B1FE1715BCBB73A513498893.pem
如果需要颁发的客户端证书较多,可以使用下面脚本实现客户端证书的批量颁发
客户端证书自动颁发脚本
[root@centos8 ~]#cat openvpn-user-crt.sh
#!/bin/bash

read -p "请输入用户的姓名拼音(如:${NAME}): " NAME
cd /etc/openvpn/easy-rsa-client/3
./easyrsa gen-req ${NAME} nopass <<EOF
EOF
cd /etc/openvpn/easy-rsa-server/3
./easyrsa import-req /etc/openvpn/easy-rsa-client/3/pki/reqs/${NAME}.req ${NAME}
./easyrsa sign client ${NAME} <<EOF
yes
EOF
2.3.9 将CA和服务器证书相关文件复制到服务器相应的目录
# 文件归类,放到统一目录方便使用
mkdir /etc/openvpn/certs
cp /etc/openvpn/easy-rsa-server/3/pki/ca.crt /etc/openvpn/certs/
cp /etc/openvpn/easy-rsa-server/3/pki/issued/server.crt /etc/openvpn/certs/
cp /etc/openvpn/easy-rsa-server/3/pki/private/server.key /etc/openvpn/certs/
cp /etc/openvpn/easy-rsa-server/3/pki/dh.pem /etc/openvpn/certs/

[root@openvpn-server ~]#ll /etc/openvpn/certs/
-rw------- 1 root root 1204 Jan 26 14:03 ca.crt
-rw------- 1 root root  424 Jan 26 14:04 dh.pem
-rw------- 1 root root 4608 Jan 26 14:04 server.crt
-rw------- 1 root root 1704 Jan 26 14:04 server.key
2.3.10 将客户端私钥与证书相关文件复制到服务器相关的目录
[root@openvpn-server ~]#mkdir /etc/openvpn/client/client-x
[root@openvpn-server ~]#find /etc/openvpn/ -name "client-x.key" -o -name "client-x.crt" -o -name "ca.crt"
/etc/openvpn/easy-rsa-server/3.0.8/pki/issued/client-x.crt
/etc/openvpn/easy-rsa-server/3.0.8/pki/ca.crt
/etc/openvpn/easy-rsa-client/3.0.8/pki/private/client-x.key
/etc/openvpn/certs/ca.crt

[root@openvpn-server ~]#find /etc/openvpn/ \( -name "client-x.key" -o -name "client-x.crt" -o -name "ca.crt" \) -exec cp {} /etc/openvpn/client/client-x \;
[14:09:08 root@openvpn-server ~]#ll /etc/openvpn/client/client-x/
total 16
-rw------- 1 root root 1204 Jan 26 14:09 ca.crt
-rw------- 1 root root 4499 Jan 26 14:09 client-x.crt
-rw------- 1 root root 1704 Jan 26 14:09 client-x.key
2.4 准备 OpenVPN 服务器配置文件
2.4.1 服务器端配置文件说明
#server.conf文件中以#或;开头的行都为注释

[root@centos8 ~]#grep -Ev "^#|^$" /etc/openvpn/server.conf
;local a.b.c.d                            #本机监听IP,默认注释监听本机所有IP,也可local 0.0.0.0
port 1194                                 #端口
;proto tcp                                #协议,生产推荐使用TCP
proto udp                                 #默认协议,速度快,数据包不做校验
;dev tap                                  #创建一个以太网隧道,以太网使用tap,一个tap设备允许完整的以太网帧通过Openvpn隧道,
                                              可提供非ip协议的支持,比如IPX协议和AppleTalk协议,tap等同于一个以太网设备,它操作第二层数据包如以太网数据帧。
dev tun                                   #创建一个路由IP隧道,生产推存使用tun.互联网使用tun,一个tun设备大多时候,
                                              被用于基于IP协议的通讯。tun模拟了网络层设备,操作第三层数据包比如IP数据封包。
;dev-node MyTap                           #TAP-Win32适配器。非windows不需要配置
ca ca.crt                                 #ca证书文件
cert server.crt                           #服务器证书文件
key server.key                            #服务器私钥文件
dh dh2048.pem                             #dh参数文件,如果dh none代表不需要dh文件
;topology subnet                          #通知子网拓扑,不需要配置
server 10.8.0.0 255.255.255.0             #客户端连接后分配IP的地址池,服务器默认会占用第一个IP10.8.0.1将做为客户端的网关
ifconfig-pool-persist ipp.txt             #为客户端分配固定IP,不需要配置,建议注释。如有就在文件中写固定ip
;server-bridge 10.8.0.4 255.255.255.0 10.8.0.50 10.8.0.100  #配置网桥模式,不需要配置,建议注释
;server-bridge
;push "route 192.168.10.0 255.255.255.0"  #给客户端生成的到达服务器后面网段的静态路由,下一跳为openvpn服务器的10.8.0.1。windows输入route PRINT
;push "route 192.168.20.0 255.255.255.0"  #推送路由信息到客户端,以允许客户端能够连接到服务器背后的其它私有子网。要提前考虑多机房地址不冲突
;client-config-dir ccd                    #为指定的客户端添加路由,此路由通常是客户端后面的内网网段而不是服务端的,也不需要设置,无法保证客户端网络不冲突
;route 192.168.40.128 255.255.255.248     #同上,不需要设置
;client-config-dir ccd
;route 10.9.0.0 255.255.255.252
;learn-address ./script                   #运行外部脚本,创建不同组的iptables规则,无需配置
;push "redirect-gateway def1 bypass-dhcp" #启用后,客户端所有流量都将通过VPN服务器,因此生产一般无需配置此项
;push "dhcp-option DNS 208.67.222.222"    #推送DNS服务器,不需要配置
;push "dhcp-option DNS 208.67.220.220"
;client-to-client                         #允许不同的client直接通信,不安全,生产环境一般无需要配置
;duplicate-cn                             #多个用户共用一个证书,一般用于测试环境,生产环境都是一个用户一个证书,无需开启
keepalive 10 120                          #设置服务端检测的间隔和超时时间,默认为每10秒ping一次,如果 120秒没有回应则认为对方已经down
tls-auth ta.key 0                         #访止DoS等攻击的安全增强配置,可以使用以下命令来生成:openvpn --genkey --secret ta.key
                                              服务器和每个客户端都需要拥有该密钥的一个拷贝。第二个参数在服务器端应该为’0’,在客户端应该为’1’
cipher AES-256-CBC                        #加密算法
;compress lz4-v2                          #启用Openvpn2.4.X新版压缩算法
;push "compress lz4-v2"                   #推送客户端使用新版压缩算法,和下面的comp-lzo不要同时使用
;comp-lzo                                 #旧户端兼容的压缩配置,需要客户端配置开启压缩,openvpn2.4.X等新版可以不用开启
;max-clients 100                          #最大客户端数
;user nobody                              #运行openvpn服务的用户和组
;group nobody
persist-key                               #重启VPN服务时默认会重新读取key文件,开启此配置后保留使用第一次的key文件,生产环境无需开启
persist-tun                               #启用此配置后,当重启vpn服务时,一直保持tun或者tap设备是up的,否则会先down然后再up,生产环境无需开启
status openvpn-status.log                 #openVPN状态记录文件,每分钟会记录一次
;log         openvpn.log                  #第一种日志记录方式,并指定日志路径,log会在openvpn启动的时候清空日志文件,不建议使用
;log-append openvpn.log                   #第二种日志记录方式,并指定日志路径,重启openvpn后在之前的日志后面追加新的日志,生产环境建议使用
verb 3                                    #设置日志级别,0-9,级别越高记录的内容越详细,0 表示静默运行,只记录致命错误,4 表示合理的常规用法,
                                              5 和 6 可以帮助调试连接错误。9 表示极度冗余,输出非常详细的日志信息
;mute 20                                  #相同类别的信息只有前20条会输出到日志文件中
explicit-exit-notify 1                    #通知客户端,在服务端重启后自动重新连接,仅能用于udp模式,tcp模式不需要配置即可实现断开重新连接,
                                              且开启此项后tcp配置后将导致openvpn服务无法启动,所以tcp时必须不能开启此项
;crl-verify /etc/openvpn/easy-rsa-server/3/pki/crl.pem # 第一次吊销证时需要编辑配置文件调用吊销证书的文件
2.4.2 修改服务器端配置文件
[root@openvpn-server ~]#vim /etc/openvpn/server.conf
port 1194                                   #开启端口
proto tcp                                   #使用的协议还可以使用udp
dev tun                                     #创建一个路由IP隧道
ca /etc/openvpn/certs/ca.crt                #ca证书文件位置
cert /etc/openvpn/certs/server.crt          #服务证书文件位置
key /etc/openvpn/certs/server.key           #服务私钥文件位置
dh /etc/openvpn/certs/dh.pem                #dh参数文件,也就是密钥交换算法文件
server 10.0.0.0 255.255.255.0               #客户端连接后分配IP的地址池

push "route 172.30.0.0 255.255.255.0"       #给客户端生成的到达服务器后面网段的静态路由

keepalive 10 120                            #设置服务端检测的间隔和超时时间
cipher AES-256-CBC                          #加密算法
compress lz4-v2                             #启用Openvpn2.4.X新版压缩算法
push "compress lz4-v2"                      #推送客户端使用新版压缩算法
max-clients 2048                            #最大客户端数
user openvpn                                #运行openvpn服务的用户和组
group openvpn
status /var/log/openvpn/openvpn-status.log  #openVPN状态记录文件,每分钟会记录一次
log-append /var/log/openvpn/openvpn.log     #第二种日志记录方式
verb 3                                      #设置日志级别
mute 20                                     #相同类别的信息只有前20条会输出到日志文件中

#准备目志相关目录
getent passwd openvpn
mkdir /var/log/openvpn
chown openvpn: /var/log/openvpn

[root@openvpn-server ~]#ll -d /var/log/openvpn/
drwxr-xr-x 2 openvpn openvpn 6 Jan 26 14:23 /var/log/openvpn/
2.5 准备iptables规则和内核参数
#在服务器开启ip_forward转发功能
echo net.ipv4.ip_forward = 1 >>/etc/sysctl.conf
#sysctl -p

#添加SNAT规则
echo "iptables -t nat -APOSTROUTING -s 10.8.0.0/24 -j MASQUERADE" >>/etc/rc.d/rc.local       # 地址伪装
echo "iptables -A INPUT -i eth0 -p tcp --dport 1194 -j ACCEPT" >>/etc/rc.d/rc.local          # 允许访问1194
echo "iptables -A INPUT -m state --stat ESTABLISHED,RELATED -j ACCEPT" >>/etc/rc.d/rc.local  # 响应连接允许
chmod +x /etc/rc.d/rc.local
/etc/rc.d/rc.local

#
[root@openvpn-server ~]#iptables -t nat -vnL
Chain PREROUTING (policy ACCEPT 0 packets, 0 bytes)
pkts bytes target     prot opt in     out     source               destination

Chain INPUT (policy ACCEPT 0 packets, 0 bytes)
pkts bytes target     prot opt in     out     source               destination

Chain POSTROUTING (policy ACCEPT 0 packets, 0 bytes)
pkts bytes target     prot opt in     out     source               destination
0     0 MASQUERADE  all  --  *      *       10.0.0.0/24          0.0.0.0/0

Chain OUTPUT (policy ACCEPT 0 packets, 0 bytes)
pkts bytes target     prot opt in     out     source               destination
2.6 启动OpenVPN服务
2.6.1 启动 OpenVPN 服务
[root@centos7 ~]#rpm -ql openvpn | grep systemd
/usr/lib/systemd/system/[email protected]
/usr/lib/systemd/system/[email protected]
/usr/lib/systemd/system/[email protected]
/usr/share/doc/openvpn-2.4.10/README.systemd

#centos8缺失unit文件,从Centos7复制文件
[root@openvpn-server ~]#rpm -ql openvpn | grep systemd
/usr/lib/systemd/system/[email protected]
/usr/lib/systemd/system/[email protected]
/usr/share/doc/openvpn/README.systemd

[root@centos7 ~]#cat /usr/lib/systemd/system/[email protected]
[Unit]
Description=OpenVPN Robust And Highly Flexible Tunneling Application On %I
After=network.target

[Service]
Type=notify
PrivateTmp=true
ExecStart=/usr/sbin/openvpn --cd /etc/openvpn/ --config %i.conf

[Install]
WantedBy=multi-user.target
[root@centos7 ~]#scp /lib/systemd/system/[email protected] 39.98.146.209:/lib/systemd/system/

#启动OpenVPN服务,注意service名称和文件名不一致
[root@openvpn-server ~]#systemctl daemon-reload
[root@openvpn-server ~]#systemctl enable --now openvpn@server
Created symlink /etc/systemd/system/multi-user.target.wants/[email protected] → /usr/lib/systemd/system/[email protected].
2.6.2 查看服务状态
[root@openvpn-server ~]#systemctl status openvpn@server
● [email protected] - OpenVPN Robust And Highly Flexible Tunneling Application On server
Loaded: loaded (/usr/lib/systemd/system/[email protected]; enabled; vendor preset: disabled)
Active: active (running) since Tue 2021-01-26 14:54:42 CST; 29s ago
Main PID: 13647 (openvpn)
Status: "Initialization Sequence Completed"
Tasks: 1 (limit: 22788)
Memory: 1.3M
CGroup: /system.slice/system-openvpn.slice/[email protected]
└─13647 /usr/sbin/openvpn --cd /etc/openvpn/ --config server.conf

Jan 26 14:54:42 openvpn-server systemd[1]: Starting OpenVPN Robust And Highly Flexible Tunneling Applicati>
Jan 26 14:54:42 openvpn-server systemd[1]: Started OpenVPN Robust And Highly Flexible Tunneling Applicatio>

#注意端口号
[root@openvpn-server ~]#ss -ntlp
State   Recv-Q  Send-Q   Local Address:Port   Peer Address:Port
LISTEN  0       32             0.0.0.0:1194        0.0.0.0:*     users:(("openvpn",pid=13647,fd=7))
LISTEN  0       128            0.0.0.0:5355        0.0.0.0:*     users:(("systemd-resolve",pid=963,fd=13))
LISTEN  0       128            0.0.0.0:111         0.0.0.0:*     users:(("systemd",pid=1,fd=59))
LISTEN  0       128            0.0.0.0:22          0.0.0.0:*     users:(("sshd",pid=1009,fd=5))
LISTEN  0       128               [::]:5355           [::]:*     users:(("systemd-resolve",pid=963,fd=15))
LISTEN  0       128               [::]:111            [::]:*     users:(("systemd",pid=1,fd=66))

[root@openvpn-server ~]#cat /var/log/openvpn/openvpn.log

[root@openvpn-server ~]#ip a
4: tun0:  mtu 1500 qdisc fq_codel state UNKNOWN group default qlen 100
inet 10.8.0.1 peer 10.8.0.2/32 scope global tun0


[root@openvpn-server ~]#route -n
Kernel IP routing table
Destination     Gateway         Genmask         Flags Metric Ref    Use Iface
0.0.0.0         172.30.0.253    0.0.0.0         UG    100    0        0 eth0
10.8.0.0        10.8.0.2        255.255.255.0   UG    0      0        0 tun0
10.8.0.2        0.0.0.0         255.255.255.255 UH    0      0        0 tun0
172.30.0.0      0.0.0.0         255.255.255.0   U     100    0        0 eth0
验证tun网卡设备

2.7 准备OpenVPN客户端配置文件
2.7.1 客户端默认范例配置文件说明
[root@openvpn-server ~]#grep -Ev "^(#|;)|^$" /usr/share/doc/openvpn/sample/sample-config-files/client.conf
client                  #声明自己是个客户端
dev tun                 #接口类型,必须和服务端保持一致
proto udp               #协议类型,必须和服务端保持一致
remote my-server-1 1194 #server端的ip和端口,可以写域名但是需要可以解析成IP
resolv-retry infinite   #如果是写的server端的域名,那么就始终解析,如果域名发生变化,会重新连接到新的域名对应的IP
nobind                  #本机不绑定监听端口,客户端是随机打开端口连接到服务端的1194
persist-key
persist-tun
ca ca.crt
cert client.crt
key client.key
remote-cert-tls server   #指定采用服务器证书校验方式
tls-auth ta.key 1
cipher AES-256-CBC
verb 3
2.7.2 生成客户端用户的配置文件
#生成客户端文件,文件后缀必须为.ovpn
[root@openvpn-server ~]#grep -Ev "^(#|;)|^$" /usr/share/doc/openvpn/sample/sample-config-files/client.conf >/etc/openvpn/client/client-x/client.ovpn

#修改配置文件,内容如下
[root@openvpn-server ~]#vim /etc/openvpn/client/client-x/client.ovpn
[root@openvpn-server ~]#cat /etc/openvpn/client/client-x/client.ovpn
client
dev tun
proto tcp
remote 39.98.146.209 1194    #生产中为OpenVPN公网IP
resolv-retry infinite
nobind
#persist-key
#persist-tun
ca ca.crt
cert client-x.crt
key client-x.key
remote-cert-tls server
#tls-auth ta.key 1
cipher AES-256-CBC
verb 3                 #此值不能随意指定,否则无法通信
compress lz4-v2        #此项在OpenVPN2.4.X版本使用,需要和服务器端保持一致,不指定默认comp-lz压缩
mac客户端使用开源软件Tunnelblick
官网:https://code.google.com/p/tunnelblick/ https://tunnelblick.net/
2.8 Windows 配置部署 OpenVPN 客户端
2.8.1 Windows 安装 OpenVPN 客户端
2.8.2 Windows客户端配置准备
#在服务器打包证书并下载发送给windows客户端
[root@openvpn-server ~]#cd /etc/openvpn/client/client-x/
[root@openvpn-server client-x]#pwd
/etc/openvpn/client/client-x
[root@openvpn-server client-x]#tar cf client-x.tar ./
tar: ./client-x.tar: file is the archive; not dumped
[root@openvpn-server client-x]#ll
total 40
-rw------- 1 root root  1204 Jan 26 14:09 ca.crt
-rw-r--r-- 1 root root   237 Jan 26 15:04 client.ovpn
-rw------- 1 root root  4499 Jan 26 14:09 client-x.crt
-rw------- 1 root root  1704 Jan 26 14:09 client-x.key
-rw-r--r-- 1 root root 20480 Jan 26 15:09 client-x.tar

[root@openvpn-server client-x]#tar -tf client-x.tar
./
./client-x.crt
./ca.crt
./client-x.key
./client.ovpn
放置到windows客户端的 C:\Program Files\OpenVPN\config 目录下
开打OpenVPN GUI
进行连接

绿色之后就表示连接正常
2.8.4 Windows客户端验证通信
- 2.8.4.1 在Windows 客户端测试访问OpenVPN后端服务器
后端服务器显示是来自于OpenVPN服务器的连接
>ping 172.30.0.100
>ssh [email protected]
- 2.8.4.2 观察OpenVPN服务器日志
[root@openvpn-server client-x]#tail /var/log/openvpn/openvpn.log -f -n0
Tue Jan 26 15:18:57 2021 TCP connection established with [AF_INET]110.17.5.83:20328
Tue Jan 26 15:18:58 2021 110.17.5.83:20328 TLS: Initial packet from [AF_INET]110.17.5.83:20328, sid=0f61dc6f b6fc7583
Tue Jan 26 15:18:58 2021 110.17.5.83:20328 VERIFY OK: depth=1, CN=Easy-RSA CA
Tue Jan 26 15:18:58 2021 110.17.5.83:20328 VERIFY OK: depth=0, CN=client-x
Tue Jan 26 15:18:58 2021 110.17.5.83:20328 peer info: IV_VER=2.4.10
Tue Jan 26 15:18:58 2021 110.17.5.83:20328 peer info: IV_PLAT=win
Tue Jan 26 15:18:58 2021 110.17.5.83:20328 peer info: IV_PROTO=2
Tue Jan 26 15:18:58 2021 110.17.5.83:20328 peer info: IV_NCP=2
Tue Jan 26 15:18:58 2021 110.17.5.83:20328 peer info: IV_CIPHERS=AES-256-GCM:AES-128-GCM:AES-256-CBC
Tue Jan 26 15:18:58 2021 110.17.5.83:20328 peer info: IV_LZ4=1
Tue Jan 26 15:18:58 2021 110.17.5.83:20328 peer info: IV_LZ4v2=1
Tue Jan 26 15:18:58 2021 110.17.5.83:20328 peer info: IV_LZO=1
Tue Jan 26 15:18:58 2021 110.17.5.83:20328 peer info: IV_COMP_STUB=1
Tue Jan 26 15:18:58 2021 110.17.5.83:20328 peer info: IV_COMP_STUBv2=1
Tue Jan 26 15:18:58 2021 110.17.5.83:20328 peer info: IV_TCPNL=1
Tue Jan 26 15:18:58 2021 110.17.5.83:20328 peer info: IV_GUI_VER=OpenVPN_GUI_11
Tue Jan 26 15:18:58 2021 110.17.5.83:20328 Control Channel: TLSv1.3, cipher TLSv1.3 TLS_AES_256_GCM_SHA384, 2048 bit RSA
Tue Jan 26 15:18:58 2021 110.17.5.83:20328 [client-x] Peer Connection Initiated with [AF_INET]110.17.5.83:20328
Tue Jan 26 15:18:58 2021 client-x/110.17.5.83:20328 MULTI_sva: pool returned IPv4=10.8.0.6, IPv6=(Not enabled)
Tue Jan 26 15:18:58 2021 client-x/110.17.5.83:20328 MULTI: Learn: 10.8.0.6 -> client-x/110.17.5.83:20328
Tue Jan 26 15:18:58 2021 client-x/110.17.5.83:20328 MULTI: primary virtual IP for client-x/110.17.5.83:20328: 10.8.0.6
Tue Jan 26 15:18:59 2021 client-x/110.17.5.83:20328 PUSH: Received control message: 'PUSH_REQUEST'
Tue Jan 26 15:18:59 2021 client-x/110.17.5.83:20328 SENT CONTROL [client-x]: 'PUSH_REPLY,route 172.30.0.0 255.255.255.0,compress lz4-v2,route 10.8.0.1,topology net30,ping 10,ping-restart 120,ifconfig 10.8.0.6 10.8.0.5,peer-id 0,cipher AES-256-GCM' (status=1)
Tue Jan 26 15:18:59 2021 client-x/110.17.5.83:20328 Data Channel: using negotiated cipher 'AES-256-GCM'
Tue Jan 26 15:18:59 2021 client-x/110.17.5.83:20328 Outgoing Data Channel: Cipher 'AES-256-GCM' initialized with 256 bit key
Tue Jan 26 15:18:59 2021 client-x/110.17.5.83:20328 Incoming Data Channel: Cipher 'AES-256-GCM' initialized with 256 bit key
- 2.8.4.3 验证OpenVPN服务器连接状态
[root@openvpn-server client-x]#ss -nt
State       Recv-Q        Send-Q               Local Address:Port                 Peer Address:Port
ESTAB       0             36                      172.30.0.1:22                    110.17.5.83:20645  #
ESTAB       0             0                       172.30.0.1:1194                  110.17.5.83:20328  #
ESTAB       0             0                       172.30.0.1:47816               100.100.30.26:80
- 2.8.4.4 验证 Windows 客户端的 IP地址
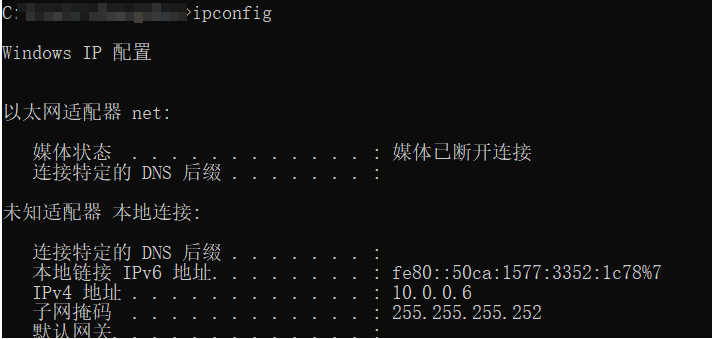
Figure 1: image-20210427141512158 - 2.8.4.5 验证Windows 客户端的路由表
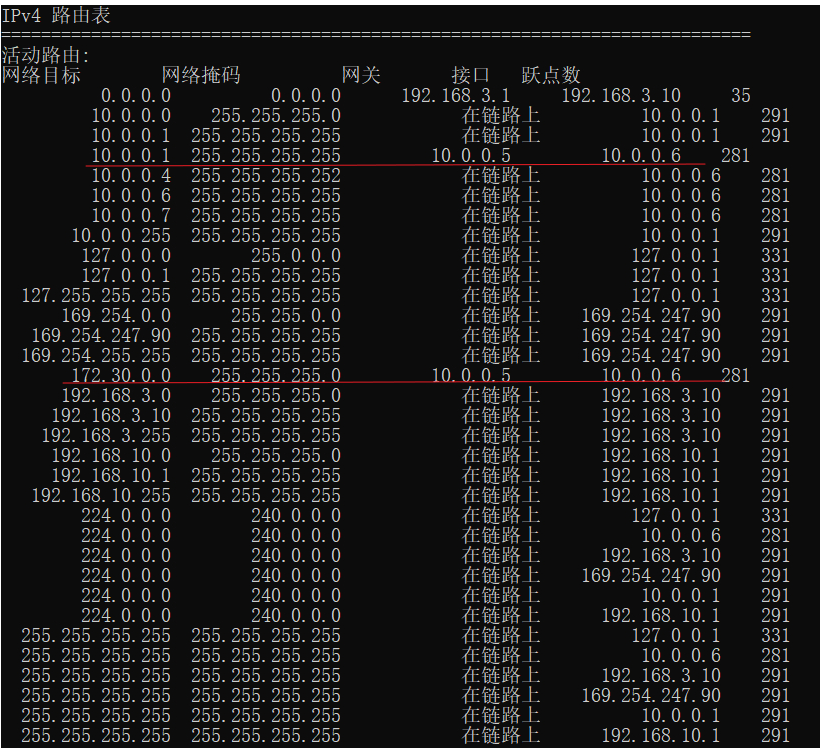
Figure 2: image-20210427153408404
2.9 Mac OS 配置部署OpenVPN 客户端
3 故障排错
3.1 在tcp模式下开启explicit-exit-notify 导致无法启动
explicit-exit-notify可以支持在UDP协议时,OpenVPN重启后,客户端自动重新连 接
[root@openvpn-server client-x]#vim /etc/openvpn/server.conf
#在tcp模式下开启通知
proto tcp
pexplicit-exit-notify 1

[root@openvpn-server client-x]#systemctl restart openvpn@server
Job for [email protected] failed because the control process exited with error code.
See "systemctl status [email protected]" and "journalctl -xe" for details.

[root@centos8 ~]#tail /var/log/openvpn/openvpn.log -f -n0
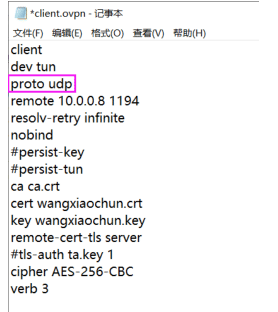
这个参数只能是UDP协议使用TCP不能使用,如要使用客户端配置文件proto需改为udp
修改配置,选择UDP协议
注意: 需要在防火墙或安全组中开启1194/UDP端口
[root@centos8 ~]#vim /etc/openvpn/server.conf
proto udp
explicit-exit-notify 1
[root@centos8 ~]#systemctl restart [email protected]
客户端也需要修改为UDP协议,否则会显示下面
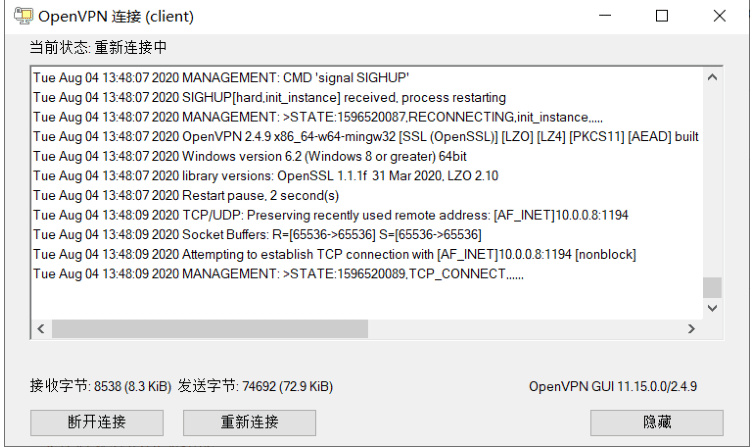
修改客户端配置文件
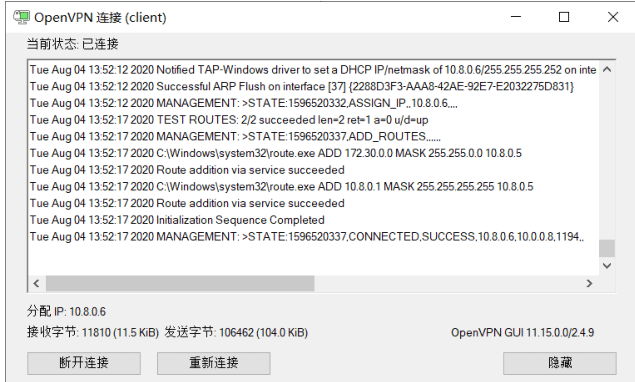
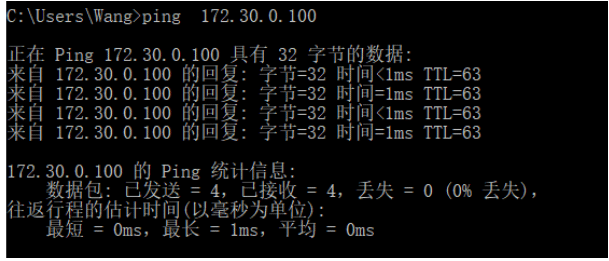
重新连接成功
3.2 压缩算法错误导致连接失败
OpenVPN 2.4.x 客户端支持更新的压缩算法lz4-v2,而comp-lzo是为老版本兼容 使用,两者不要在一起混用,否则可能会导致连接失败
#开启兼容的压缩功能
[root@openvpn-server client-x]#vim /etc/openvpn/server.conf
compress lz4-v2
push "compress lz4-v2"
comp-lzo     #添加此行
[root@openvpn-server client-x]#systemctl restart openvpn@server

#windows客户端连接后,服务器可以看到下面日志提示
[root@openvpn-server client-x]#tail /var/log/openvpn/openvpn.log -f -n0
Tue Jan 26 15:32:42 2021 client-x/110.17.5.83:20997 Bad LZO decompression header byte: 96
Tue Jan 26 15:32:42 2021 client-x/110.17.5.83:20997 Bad LZO decompression header byte: 96
Tue Jan 26 15:32:42 2021 client-x/110.17.5.83:20997 Bad LZO decompression header byte: 80
Tue Jan 26 15:32:43 2021 client-x/110.17.5.83:20997 Bad LZO decompression header byte: 80
Tue Jan 26 15:32:43 2021 client-x/110.17.5.83:20997 Bad LZO decompression header byte: 80
Tue Jan 26 15:32:43 2021 client-x/110.17.5.83:20997 Bad LZO decompression header byte: 96
Tue Jan 26 15:32:43 2021 client-x/110.17.5.83:20997 Bad LZO decompression header byte: 96
在客户端可以看到下面提示

客户端无法访问后端服务器, ping IP地址超时
#关闭兼容的压缩功能
[root@centos8 ~]#vim /etc/openvpn/server.conf
;comp-lzo
[root@centos8 ~]#systemctl restart [email protected]
客户端重新连接,访问后端服务器成功
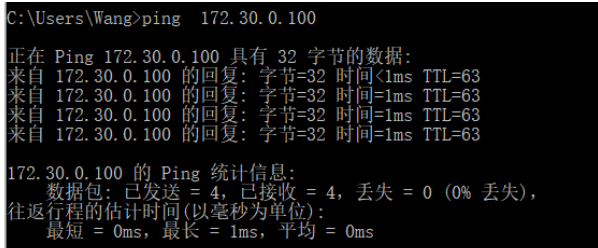
3.3 工作模式错误
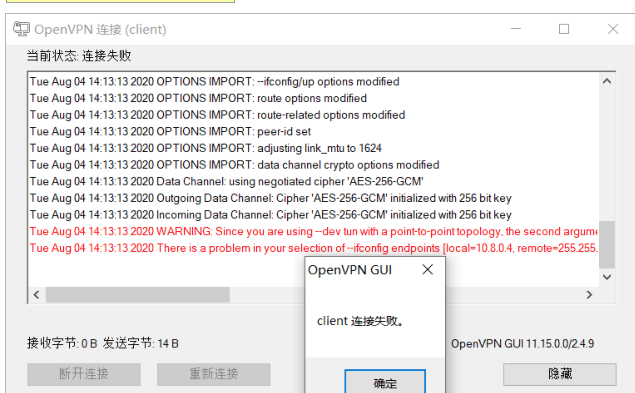
OpenVPN两种工作模式:TUN和TAP,都可以支持TCP和UDP协议,但如果服务器和客户 工作模式不同,比如服务器为TAP,客户端为TUN,会导致连接失败
客户端和服务端的配置文件必须相同不然会提示连接失败
[root@centos8 ~]#vim /etc/openvpn/server.conf
dev tap
;dev tun

[root@centos8 ~]#systemctl restart [email protected]
[root@centos8 ~]#ip a
1: lo: <LOOPBACK,UP,LOWER_UP> mtu 65536 qdisc noqueue state UNKNOWN group
default qlen 1000
 link/loopback 00:00:00:00:00:00 brd 00:00:00:00:00:00
 inet 127.0.0.1/8 scope host lo
   valid_lft forever preferred_lft forever
 inet6 ::1/128 scope host
   valid_lft forever preferred_lft forever
2: eth0: <BROADCAST,MULTICAST,UP,LOWER_UP> mtu 1500 qdisc fq_codel state UP
group default qlen 1000
 link/ether 00:0c:29:8a:51:21 brd ff:ff:ff:ff:ff:ff
 inet 10.0.0.8/24 brd 10.0.0.255 scope global noprefixroute eth0
   valid_lft forever preferred_lft forever
3: eth1: <BROADCAST,MULTICAST,UP,LOWER_UP> mtu 1500 qdisc fq_codel state UP
group default qlen 1000
 link/ether 00:0c:29:8a:51:2b brd ff:ff:ff:ff:ff:ff
 inet 172.30.0.1/24 brd 172.30.0.255 scope global noprefixroute eth1
   valid_lft forever preferred_lft forever
 inet6 fe80::20c:29ff:fe8a:512b/64 scope link
   valid_lft forever preferred_lft forever
15: tap0: <BROADCAST,MULTICAST,UP,LOWER_UP> mtu 1500 qdisc fq_codel state
UNKNOWN group default qlen 100
 link/ether 6a:5c:7d:7a:0d:6e brd ff:ff:ff:ff:ff:ff
 inet 10.8.0.1/24 brd 10.8.0.255 scope global tap0
   valid_lft forever preferred_lft forever
 inet6 fe80::685c:7dff:fe7a:d6e/64 scope link
   valid_lft forever preferred_lft forever
[root@centos8 ~]#tail -n 20 /var/log/openvpn/openvpn.log
[root@centos8 ~]#route -n
因为客户端为TUN模式,导致连接失败
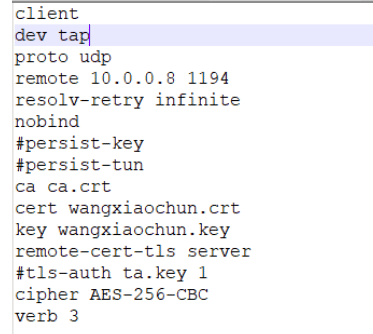
修改客户端也为TAP模式
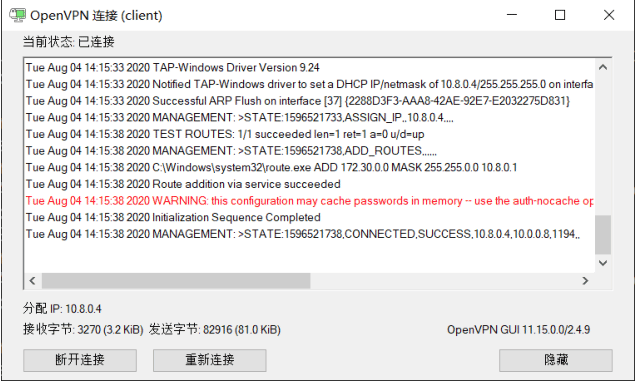
再次连接成功
4 OpenVPN 高级功能
本节介绍OpenVPN的高级功能,主要关于安全加强及客户端的管理功能,比如:员工入职、离职涉及到的创建账户与吊销账户证书。
4.1 启用安全增强功能
启用防止DoS攻击的安全增强配置
[root@openvpn-server ~]#openvpn --genkey --secret /etc/openvpn/certs/ta.key
[root@openvpn-server ~]#cat /etc/openvpn/certs/ta.key
#

# 2048 bit OpenVPN static key

#
-----BEGIN OpenVPN Static key V1-----
98f2e8b46308ad6c40fdbcb53cbafce6
e3f7970ddae64849f4c160047fc88866
f717dab259981ea836eeb7ef31a778d9
1cc8b20962c79cb3d2fda168819bc8c6
bc8386f0de5264712d8ebb358c8c8f2a
dcd5a1e15a3e3f76346e84496ba12052
2c53a5f055486c9200ef0855d2df9e9e
ecc71a8c4dd8bec1ff15ac20e44aec77
52c289b343a20979c3b52ea466585073
c14752e40e6b8ce5ef5d0f8ed894a82e
ff8c6f784c7ec9b87f51cdaad9ee06b2
ea22307d87c1e6b31292819e0d8ddcf7
dc324b5a7e968ae1b3334f61af6a4b6e
91a2992a580edbd4b8c584bfbe7fa8f4
1a22ca55777827c49b237157d03d1d68
75fc0d4eb632da7e61d258594ade093b
-----END OpenVPN Static key V1-----
[root@openvpn-server ~]#ll /etc/openvpn/certs/
total 24
-rw------- 1 root root 1204 Jan 26 14:03 ca.crt
-rw------- 1 root root  424 Jan 26 14:04 dh.pem
-rw------- 1 root root 4608 Jan 26 14:04 server.crt
-rw------- 1 root root 1704 Jan 26 14:04 server.key
-rw------- 1 root root  636 Jan 26 15:38 ta.key
[root@openvpn-server ~]#vim /etc/openvpn/server.conf
tls-auth /etc/openvpn/certs/ta.key 0    #服务器端为0,客户端为1

[root@centos8 ~]#systemctl restart [email protected]
#日志提示出错
root@centos8 ~]#tail -n 20 /var/log/openvpn/openvpn.log -f
Tue Aug  4 15:56:30 2020 TLS Error: cannot locate HMAC in incoming packet from
[AF_INET]10.0.0.1:59743
Tue Aug  4 15:56:39 2020 TLS Error: cannot locate HMAC in incoming packet from
[AF_INET]10.0.0.1:59743
Tue Aug  4 15:56:45 2020 TLS Error: cannot locate HMAC in incoming packet from
[AF_INET]10.0.0.1:59073
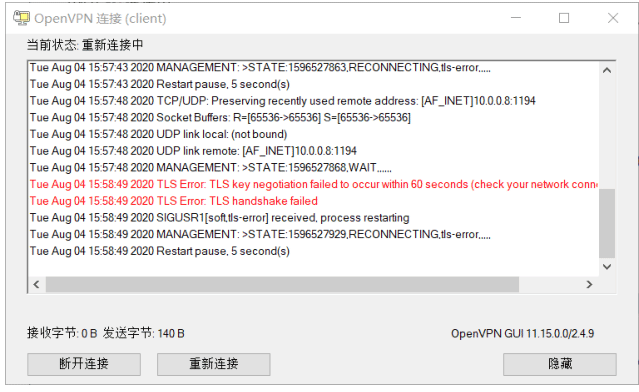
客户端无法直接连接
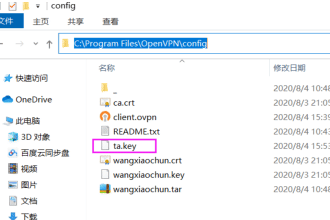
将ta.key 传到客户端相关目录下
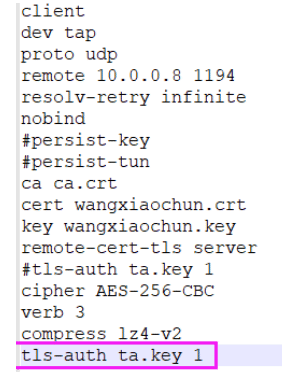
修改客户端配置文件clent.ovpn,添加一行
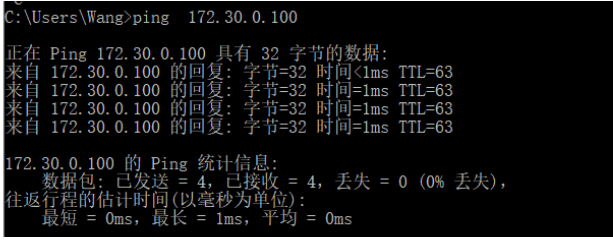
客户端重新连接成功
客户端配置文件需要添加tls-auth ta.key 1,并把key文件放到客户端中
4.2 设置客户端的私钥密码增强安全性
新建一个账户cy,并且设置证书密码,提高证书及登录VPN的安全性。
4.2.1 创建新用户,生成对应的有密码的私钥和证书申请
cd /etc/openvpn/easy-rsa-client/3
#./easyrsa gen-req cy  nopass # 不带密码的证书
./easyrsa gen-req cy         # 带密码的证书 123456
[root@openvpn-server 3]#./easyrsa gen-req cy

Note: using Easy-RSA configuration from: /etc/openvpn/easy-rsa-client/3.0.8/vars
Using SSL: openssl OpenSSL 1.1.1g FIPS  21 Apr 2020
Generating a RSA private key
..............+++++
....................+++++
writing new private key to '/etc/openvpn/easy-rsa-client/3/pki/easy-rsa-14457.v8A2IC/tmp.k97esu'
Enter PEM pass phrase:              #输入2遍密码
Verifying - Enter PEM pass phrase:
----------------------------------

You are about to be asked to enter information that will be incorporated
into your certificate request.
What you are about to enter is what is called a Distinguished Name or a DN.
There are quite a few fields but you can leave some blank
For some fields there will be a default value,
If you enter '.', the field will be left blank.
-----------------------------------------------

Common Name (eg: your user, host, or server name) [cy]:   #默认确认

Keypair and certificate request completed. Your files are:
req: /etc/openvpn/easy-rsa-client/3/pki/reqs/cy.req
key: /etc/openvpn/easy-rsa-client/3/pki/private/cy.key
4.2.2 导入用户证书申请并颁发证书
#cd /etc/openvpn/easy-rsa-server/3
./easyrsa import-req /etc/openvpn/easy-rsa-client/3/pki/reqs/cy.req cy
ll /etc/openvpn/easy-rsa-server/3/pki/reqs/cy.req

#确保证书有效期是合理值
[root@centos8 3]#grep EASYRSA_CERT_EXPIRE vars
set_var EASYRSA_CERT_EXPIRE 90

#颁发证书
[root@openvpn-server 3]#./easyrsa sign client cy
Confirm request details: yes
Certificate created at: /etc/openvpn/easy-rsa-server/3/pki/issued/cy.crt
4.2.3 将用户的证书相关文件放在指定的目录中
mkdir /etc/openvpn/client/cy
cp /etc/openvpn/easy-rsa-server/3/pki/issued/cy.crt /etc/openvpn/client/cy
cp /etc/openvpn/easy-rsa-server/3/pki/private/cy.key /etc/openvpn/client/cy
cp /etc/openvpn/certs/{ca.crt,dh.pem,ta.key} /etc/openvpn/client/cy
cp /etc/openvpn/client/client-x/client.ovpn /etc/openvpn/client/cy

[root@openvpn-server 3]#ll /etc/openvpn/client/cy/
total 28
-rw------- 1 root root 1204 Jan 26 15:55 ca.crt
-rw-r--r-- 1 root root  255 Jan 26 15:56 client.ovpn
-rw------- 1 root root 4484 Jan 26 15:53 cy.crt
-rw------- 1 root root 1854 Jan 26 16:00 cy.key
-rw------- 1 root root  424 Jan 26 15:55 dh.pem
-rw------- 1 root root  636 Jan 26 15:55 ta.key

[root@openvpn-server 3]#cd /etc/openvpn/client/cy/

#根据服务器端修改下面配置,需要和服务器同步
[root@openvpn-server cy]#vim client.ovpn
client
dev tun
proto tcp
remote 39.98.146.209 1194
resolv-retry infinite
nobind
#persist-key
#persist-tun
ca ca.crt
cert cy.crt
key cy.key
remote-cert-tls server
#tls-auth ta.key 1
cipher AES-256-CBC
verb 3
compress lz4-v2
tls-auth ta.key 1

# 归档压缩
tar cf cy.tar.gz ./
4.2.4 将相关文件传给客户端主机相应目录
放置到windows客户端的 C:\Program Files\OpenVPN\config 目录下
4.2.5 Windows 客户端重新连接
查看日志
4.3 账户证书管理
主要是证书的创建和吊销,对应的员工的入职和离职
4.3.1 证书自动过期
过期时间以服务器时间为准,如果过期,需要重新颁发证书
#过期时间由以下设置决定
[root@centos8 ~]#grep EASYRSA_CERT_EXPIRE /etc/openvpn/easy-rsa-server/3/vars
set_var EASYRSA_CERT_EXPIRE 90
如果证书过期,在服务器端可以看到以下日志
#让服务器时间改为2年后时间
[root@openvpn-server cy]#date -s '2 year'
Thu Jan 26 16:08:26 CST 2023

#服务器端日志中会显示用户证书过期
[root@openvpn-server cy]#tail -f /var/log/openvpn/openvpn.log -n0
Thu Jan 26 16:10:16 2023 TCP connection established with [AF_INET]110.17.5.83:20296
Thu Jan 26 16:10:16 2023 110.17.5.83:20296 TLS: Initial packet from [AF_INET]110.17.5.83:20296, sid=5b28249e 72485450
Thu Jan 26 16:10:17 2023 110.17.5.83:20296 VERIFY OK: depth=1, CN=Easy-RSA CA
Thu Jan 26 16:10:17 2023 110.17.5.83:20296 VERIFY ERROR: depth=0, error=certificate has expired: CN=cy, serial=311680221580796027677648559459392328591
Thu Jan 26 16:10:17 2023 110.17.5.83:20296 OpenSSL: error:1417C086:SSL routines:tls_process_client_certificate:certificate verify failed
Thu Jan 26 16:10:17 2023 110.17.5.83:20296 TLS_ERROR: BIO read tls_read_plaintext error
Thu Jan 26 16:10:17 2023 110.17.5.83:20296 TLS Error: TLS object -> incoming plaintext read error
Thu Jan 26 16:10:17 2023 110.17.5.83:20296 TLS Error: TLS handshake failed
Thu Jan 26 16:10:17 2023 110.17.5.83:20296 Fatal TLS error (check_tls_errors_co), restarting
Thu Jan 26 16:10:17 2023 110.17.5.83:20296 SIGUSR1[soft,tls-error] received, client-instance restarting
4.3.2 证书手动注销
- 4.3.2.1 查看当前证书的有效性,有效为V,无效为R
[16:11:54 root@openvpn-server ~]#cat /etc/openvpn/easy-rsa-server/3/pki/index.txt
V   310124043132Z       5D3B930AA9D6B0AF69E65FA76C6251C4    unknown /CN=server
V   210725055946Z       8EB7E418B1FE1715BCBB73A513498893    unknown /CN=client-x
V   210725075159Z       EA7B6D5BC57A40FD5959D1740320938F    unknown /CN=cy
- 4.3.2.2 吊销指定的用户的证书
[root@openvpn-server ~]#cd /etc/openvpn/easy-rsa-server/3
[root@openvpn-server 3]#./easyrsa revoke cy

Note: using Easy-RSA configuration from: /etc/openvpn/easy-rsa-server/3.0.8/vars
Using SSL: openssl OpenSSL 1.1.1g FIPS  21 Apr 2020

Please confirm you wish to revoke the certificate with the following subject:

subject=
commonName                = cy

Type the word 'yes' to continue, or any other input to abort.
Continue with revocation: yes
Using configuration from /etc/openvpn/easy-rsa-server/3/pki/easy-rsa-14869.nncxHf/tmp.36WIhl
Revoking Certificate EA7B6D5BC57A40FD5959D1740320938F.
Data Base Updated

IMPORTANT!!!

Revocation was successful. You must run gen-crl and upload a CRL to your
infrastructure in order to prevent the revoked cert from being accepted.

#查看当前证书的有效性,有效为V,无效为R
[root@centos8 3]#cat /etc/openvpn/easy-rsa-server/3/pki/index.txt
V   310124043132Z       5D3B930AA9D6B0AF69E65FA76C6251C4    unknown /CN=server
V   210725055946Z       8EB7E418B1FE1715BCBB73A513498893    unknown /CN=client-x
R   210725075159Z       EA7B6D5BC57A40FD5959D1740320938F    unknown /CN=cy
#当前断开客户端连接,me用户仍然能连接成功
- 4.3.2.3 生成证书吊销列表
#每次吊销证书后都需要更新证书吊销列表文件,并且需要重启OpenVPN服务
[root@openvpn-server 3]#./easyrsa gen-crl

Note: using Easy-RSA configuration from: /etc/openvpn/easy-rsa-server/3.0.8/vars
Using SSL: openssl OpenSSL 1.1.1g FIPS  21 Apr 2020
Using configuration from /etc/openvpn/easy-rsa-server/3/pki/easy-rsa-14912.pXdWC2/tmp.JqsCVv

An updated CRL has been created.
CRL file: /etc/openvpn/easy-rsa-server/3/pki/crl.pem

[root@openvpn-server 3]#cat pki/crl.pem
-----BEGIN X509 CRL-----
MIIB3DCBxQIBATANBgkqhkiG9w0BAQsFADAWMRQwEgYDVQQDDAtFYXN5LVJTQSBD
QRcNMjEwMTI2MDgxNDQzWhcNMjEwNzI1MDgxNDQzWjAkMCICEQDqe21bxXpA/VlZ
0XQDIJOPFw0yMTAxMjYwODEzMDhaoFUwUzBRBgNVHSMESjBIgBQoyNfaufa2jaEC
RtJ+9ve4X5qANKEapBgwFjEUMBIGA1UEAwwLRWFzeS1SU0EgQ0GCFBB9VrzPLTr+
IL6acSTyhMQ3Yac4MA0GCSqGSIb3DQEBCwUAA4IBAQDALTvWucW3kSW5Dt14uENQ
yF1ad+FkcXxXa3Y3PKR8eQOmc9vL9vTsctR4SvuIT70UmNVZhkGAk+Ioi5SBIKJa
CgMxpZe6u9Slwl5kNy4IVuQYzu59e3azUOb6v4B0rpEI2WxW5Van/niGLKOg/wJt
Nft5IJCrTQF6NBjDugqV9/EIrBa9Pks2qQsShGCj/+VYapGgY7UJxL/1H5STt+Sd
t2CDqj4kFe+yXAgo8CwM2zzPtWkc1pg4U1BwHkVDYZvCoklZshh4a17KfdubXTPQ
NLLMuDu3J0R/Ld2IumxbBl11ys5AOoUG1xVoNQjqV+YJkDDOZOV88FVoloGX/gJo
-----END X509 CRL-----
- 4.3.2.4 将吊销列表文件发布
#第一次吊销证时需要编辑配置文件调用吊销证书的文件,后续吊销无需此步
[root@openvpn-server 3]#vim /etc/openvpn/server.conf
crl-verify /etc/openvpn/easy-rsa-server/3/pki/crl.pem

#每次吊销证书后,都需要重新启动才能生效 ,改成支持reload重读配置文件比较好
[root@openvpn-server 3]#systemctl restart openvpn@server
4.3.3 账户重名证书签发
假如公司已有员工叫me已经离职,且证书已被吊销,现在又新来一个员工仍叫me,那么一般的区分办法是在用户名后面加数字,如:me1、me2等,假如还想使用me这个账户名签发证书的话,那么需要删除服务器之前me的账户,并删除签发记录和证书,否则新用户的证书无法导入,并重新颁发证书
- 4.3.3.1 手动重新颁发证书
#删除已离职备撤销的账户证书
cd /etc/openvpn/easy-rsa-client/3/
rm -f pki/private/me.key
rm -f pki/reqs/me.req
rm -rf /etc/openvpn/client/me/*
rm -f /etc/openvpn/easy-rsa-server/3/pki/reqs/me.req
rm -f /etc/openvpn/easy-rsa-server/3/pki/issued/me.crt
#删除之前的带R的吊销记录,此为可选项
[root@centos8 3]#vim /etc/openvpn/easy-rsa-server/3/pki/index.txt

#重新生成新的账户证书申请和私钥
[root@centos8 3]#cd /etc/openvpn//easy-rsa-client/3
[root@centos8 3]#./easyrsa gen-req me
Note: using Easy-RSA configuration from: /etc/openvpn/easy-rsa-client/3.0.7/vars
Using SSL: openssl OpenSSL 1.1.1c FIPS     28 May 2019
Generating a RSA private key
..................................+++++
.........+++++
writing new private key to '/etc/openvpn/easy-rsa-client/3/pki/easy-rsa-
26582.hrORzD/tmp.bTOf5p'
Enter PEM pass phrase:
Verifying - Enter PEM pass phrase:
-----
You are about to be asked to enter information that will be incorporated
into your certificate request.
What you are about to enter is what is called a Distinguished Name or a DN.
There are quite a few fields but you can leave some blank
For some fields there will be a default value,
If you enter '.', the field will be left blank.
-----
Common Name (eg: your user, host, or server name) [me]:#直接回车
Keypair and certificate request completed. Your files are:
req: /etc/openvpn/easy-rsa-client/3/pki/reqs/me.req
key: /etc/openvpn/easy-rsa-client/3/pki/private/me.key

#CA导入证书并签发
[root@centos8 3]#cd /etc/openvpn/easy-rsa-server/3
[root@centos8 3]#./easyrsa import-req /etc/openvpn/easy-rsa-client/3/pki/reqs/me.req me
[root@centos8 3]#./easyrsa sign client me
......
Confirm request details: yes     #输入yes
......
Certificate created at: /etc/openvpn/easy-rsa-server/3/pki/issued/me.crt

#生成相关文件
cp /etc/openvpn/easy-rsa-server/3/pki/issued/me.crt /etc/openvpn/client/me/
cp /etc/openvpn/easy-rsa-client/3/pki/private/me.key /etc/openvpn/client/me/
cp /etc/openvpn/certs/{ca.crt,dh.pem,ta.key} /etc/openvpn/client/me/
cp /etc/openvpn/client/zcici/client.ovpn /etc/openvpn/client/me/

#修改客户端配置文件
[root@centos8 3]#vim /etc/openvpn/client/me/client.ovpn
client
dev tun
proto tcp
remote 10.0.0.8 1194
resolv-retry infinite
nobind
#persist-key
#persist-tun
ca ca.crt
cert me.crt
key me.key
remote-cert-tls server
tls-auth ta.key 1
cipher AES-256-CBC
verb 3
compress lz4-v2

[root@centos8 ~]#tree /etc/openvpn/client/me
/etc/openvpn/client/me
├── ca.crt
├── client.ovpn
├── dh.pem
├── me.crt
├── me.key
└── ta.key

#将/etc/openvpn/client/me所有文件打包传到客户端用
- 4.3.3.2 自动化的证书颁发脚本
通过脚本实现自动化的证书颁发
1.在easy-rsa-client证书环境生成req和key文件
2.在easy-rsa-server导入req文件
3.在easy-rsa-server签发证书
4.证书整理
5.自动生成密码记录密码,打包客户端证书
脚本内容
[root@centos8 ~]#cat openvpn-user-crt.sh
#!/bin/bash
#
. /etc/init.d/functions
OPENVPN_SERVER=<OpenVPN Server 公网IP>
PASS=123456
remove_cert () {
        rm -rf /etc/openvpn/client/${NAME}
        find /etc/openvpn/ -name "$NAME.*" -delete
}
create_cert () {
        cd /etc/openvpn/easy-rsa-client/3
    ./easyrsa gen-req ${NAME} nopass <<EOF
EOF
        cd /etc/openvpn/easy-rsa-server/3
    ./easyrsa import-req /etc/openvpn/easy-rsa-client/3/pki/reqs/${NAME}.req
${NAME}
    ./easyrsa sign client ${NAME} <<EOF
yes
EOF

        mkdir /etc/openvpn/client/${NAME}
        cp /etc/openvpn/easy-rsa-server/3/pki/issued/${NAME}.crt /etc/openvpn/client/${NAME}
        cp /etc/openvpn/easy-rsa-client/3/pki/private/${NAME}.key /etc/openvpn/client/${NAME}
        cp /etc/openvpn/certs/{ca.crt,dh.pem,ta.key} /etc/openvpn/client/${NAME}
        cat > /etc/openvpn/client/${NAME}/client.ovpn <<EOF
client
dev tun
proto tcp
remote 10.0.0.8 1194
resolv-retry infinite
nobind
#persist-key
#persist-tun
ca ca.crt
cert $NAME.crt
key $NAME.key
remote-cert-tls server
tls-auth ta.key 1
cipher AES-256-CBC
verb 3
compress lz4-v2
EOF
        echo "证书存放路径:/etc/openvpn/client/${NAME},证书文件如下:"
        echo -e "\E[1;32m******************************************************************\E[0m"
        ls -l /etc/openvpn/client/${NAME}
        echo -e "\E[1;32m******************************************************************\E[0m"
        cd /etc/openvpn/client/${NAME}
    zip -qP "$PASS" /root/${NAME}.zip *
    action     "证书的打包文件已生成: /root/${NAME}.zip"
}
read -p "请输入用户的姓名拼音(如:zcici): " NAME
remove_cert
create_cert
执行脚本
[root@centos8 ~]#bash openvpn-user-crt.sh
请输入用户的姓名拼音(如:): me
Note: using Easy-RSA configuration from: /etc/openvpn/easy-rsa-client/3.0.7/vars
Using SSL: openssl OpenSSL 1.1.1c FIPS     28 May 2019
Generating a RSA private key
................................................................................
................................................................................
............................+++++
............................................................................++++
+
writing new private key to '/etc/openvpn/easy-rsa-client/3/pki/easy-rsa-
13504.eqdKk5/tmp.kowkjQ'
-----
You are about to be asked to enter information that will be incorporated
into your certificate request.
What you are about to enter is what is called a Distinguished Name or a DN.
There are quite a few fields but you can leave some blank
For some fields there will be a default value,
If you enter '.', the field will be left blank.
-----
Common Name (eg: your user, host, or server name) [me]:
Keypair and certificate request completed. Your files are:
req: /etc/openvpn/easy-rsa-client/3/pki/reqs/me.req
key: /etc/openvpn/easy-rsa-client/3/pki/private/me.key
Note: using Easy-RSA configuration from: /etc/openvpn/easy-rsa-server/3.0.7/vars
Using SSL: openssl OpenSSL 1.1.1c FIPS     28 May 2019
The request has been successfully imported with a short name of: me
You may now use this name to perform signing operations on this request.
Note: using Easy-RSA configuration from: /etc/openvpn/easy-rsa-server/3.0.7/vars
Using SSL: openssl OpenSSL 1.1.1c FIPS     28 May 2019
You are about to sign the following certificate.
Please check over the details shown below for accuracy. Note that this request
has not been cryptographically verified. Please be sure it came from a trusted
source or that you have verified the request checksum with the sender.
Request subject, to be signed as a client certificate for 90 days:
subject=
    commonName                                 = me
Type the word 'yes' to continue, or any other input to abort.
Confirm request details: Using configuration from /etc/openvpn/easy-rsa-
server/3/pki/easy-rsa-13552.TvELex/tmp.Gx7dds
Check that the request matches the signature
Signature ok
The Subject's Distinguished Name is as follows
commonName                     :ASN.1 12:'me'
Certificate is to be certified until Nov     3 13:50:50 2020 GMT (90 days)
Write out database with 1 new entries
Data Base Updated
Certificate created at: /etc/openvpn/easy-rsa-server/3/pki/issued/me.crt
证书存放路径:/etc/openvpn/client/me,证书文件如下:
******************************************************************
total 28
-rw------- 1 root root 1204 Aug     5 21:50 ca.crt
-rw-r--r-- 1 root root     225 Aug     5 21:50 client.ovpn
-rw------- 1 root root     424 Aug     5 21:50 dh.pem
-rw------- 1 root root 4492 Aug     5 21:50 me.crt
-rw------- 1 root root 1704 Aug     5 21:50 me.key
-rw------- 1 root root     636 Aug     5 21:50 ta.key
******************************************************************
证书的打包文件已生成: /root/me.zip                                 [ OK ]
- 4.3.3.3 在Windows客户端用新证书连接登录
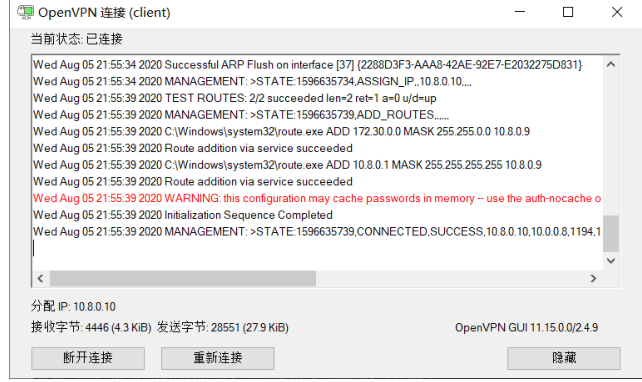
Figure 3: image-20210219201049239 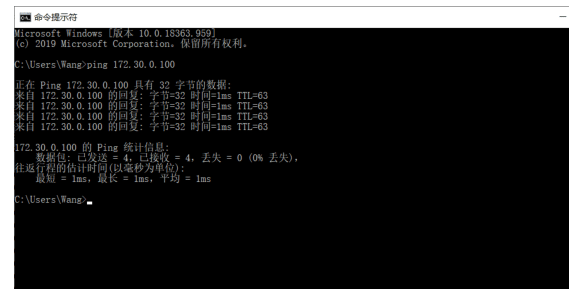
Figure 4: image-20210219201055887
4.4 生产推荐配置文件
server端和client端的生产推荐配置文件分别如下
4.4.1 server 端配置
[root@openvpn-server ~]# cat /etc/openvpn/server.conf
port 1194
proto tcp
#pexplicit-exit-notify 1
dev tun
ca /etc/openvpn/certs/ca.crt
cert /etc/openvpn/certs/server.crt
key /etc/openvpn/certs/server.key
dh /etc/openvpn/certs/dh.pem
server 10.0.0.0 255.255.255.0
push "route 172.30.0.0 255.255.255.0"
keepalive 10 120
cipher AES-256-CBC
compress lz4-v2
push "compress lz4-v2"
;comp-lzo
max-clients 2048
user openvpn
group openvpn
status /var/log/openvpn/openvpn-status.log
log-append /var/log/openvpn/openvpn.log
verb 3
mute 200
tls-auth /etc/openvpn/certs/ta.key 0
crl-verify /etc/openvpn/easy-rsa-server/3/pki/crl.pem # 第一次吊销证时需要编辑配置文件调用吊销证书的文件
4.4.2 client 端配置
[root@openvpn-server ~]# cat /etc/openvpn/client-file/client.ovpn
client
dev tun
proto tcp
remote 39.98.146.209 1194
resolv-retry infinite
nobind
#persist-key
#persist-tun
ca ca.crt
cert client.crt
key client.key
remote-cert-tls server
#tls-auth ta.key 1
cipher AES-256-CBC
verb 3
compress lz4-v2
tls-auth ta.key 1
4.5 插件
4.5.1 脚本插件
脚本插件可以通过在服务器端配置文件中添加 auth-user-pass-verify 指令来使用
auth-user-pass-verify auth-pam.pl via-file
范例:基于用户名密码登录
#1.首先我们需要编写一个用户认证的脚本 (脚本是由openvpn官网提供的)
cat <<\EOF >> /etc/openvpn/checkpsw.sh
#!/bin/sh
###########################################################
# checkpsw.sh (C) 2004 Mathias Sundman
#
# This script will authenticate OpenVPN users against
# a plain text file. The passfile should simply contain
# one row per user with the username first followed by
# one or more space(s) or tab(s) and then the password.

PASSFILE="/etc/openvpn/psw-file"
LOG_FILE="/etc/openvpn/openvpn-password.log"
TIME_STAMP=`date "+%Y-%m-%d %T"`

###########################################################

if [ ! -r "${PASSFILE}" ]; then
  echo "${TIME_STAMP}: Could not open password file \"${PASSFILE}\" for reading." >> ${LOG_FILE}
  exit 1
fi

CORRECT_PASSWORD=`awk '!/^;/&&!/^#/&&$1=="'${username}'"{print $2;exit}' ${PASSFILE}`

if [ "${CORRECT_PASSWORD}" = "" ]; then
  echo "${TIME_STAMP}: User does not exist: username=\"${username}\", password=\"${password}\"." >> ${LOG_FILE}
  exit 1
fi

if [ "${password}" = "${CORRECT_PASSWORD}" ]; then
  echo "${TIME_STAMP}: Successful authentication: username=\"${username}\"." >> ${LOG_FILE}
  exit 0
fi

echo "${TIME_STAMP}: Incorrect password: username=\"${username}\", password=\"${password}\"." >> ${LOG_FILE}
exit 1
EOF

chmod 755 /etc/openvpn/checkpsw.sh # 脚本加执行权限


#2.现在我们配置用户密码文件
cat /etc/openvpn/psw-file
abcdocker 123456
abc 123456
test test
#前面为用户名,后面为密码。 中间使用空格分开

#3.配置openvpn的server.conf
cat >>/etc/openvpn/server.conf<<EOF
script-security 3 system             #允许通过环境变量将密码传递给脚本
auth-user-pass-verify /etc/openvpn/checkpsw.sh via-env    #指定用户认证脚本
client-cert-not-required             #不使用客户端证书,使用密码对
username-as-common-name              #使用认证用户名,不使用证书的common name
EOF
#在service.conf最后一行添加

#4.修改client.ovpn
client
dev tun
proto tcp
remote 192.168.0.11 1194
resolv-retry infinite
nobind
persist-key
persist-tun
ca ca.crt
;cert cyh.crt      #注释
;key cyh.key       #注释
tls-auth ta.key 1
cipher AES-256-CBC
comp-lzo
verb 3
auth-user-pass              #使用用户名密码登录openvpn服务器
#主要是注释crt和key路径,以及添加一行auth-user-pass

#5.重启openvpn
systemctl restart openvpn@server
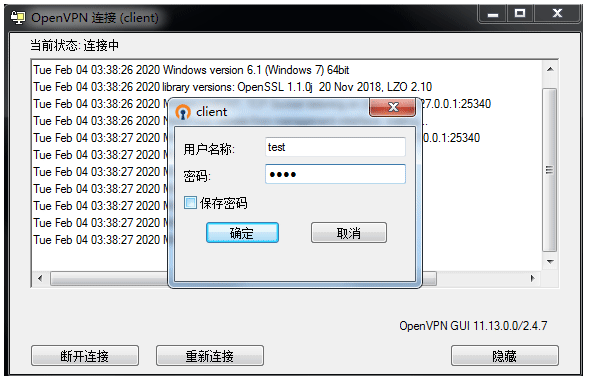
4.5.2 mysql插件
范例:
#1.创建mysql库表
mysql> create database openvpn;
mysql> use openvpn;
#创建用户表
mysql> create table vpnuser (
   name         char (100) not null,
   password     char (255) default null,
   active       int (10) not null default 1,
   primary key  (name)
   );
mysql> desc vpnuser;
#创建登录表
mysql> create table logtable (
   msg     char (254),
   user    char (100),
   pid     char (100),
   host    char (100),
   rhost   char (100),
   time    char (100)
   );
mysql> desc logtable;
#插入一条用户数据,用户名test1 密码test1
mysql> insert into vpnuser (name,password) values ('test1',password('test1'));
#创建库授权连接账号
mysql> grant all on openvpn.* to vpn@'localhost' identified by 'vpn';
mysql> flush privileges;

#2.安装pam_mysql模块
yum install pam_mysql -y
#配置pam_mysql模块
vim /etc/pam.d/openvpn
auth sufficient pam_mysql.so user=vpn passwd=vpn host=localhost db=openvpn table=vpnuser usercolumn=name passwdcolumn=password [where=vpnuser.active=1] sqllog=0 crypt=2 sqllog=true logtable=logtable logmsgcolumn=msg logusercolumn=user logpidcolumn=pid loghostcolumn=host logrhostcolumn=rhost logtimecolumn=time
account required pam_mysql.so user=vpn passwd=vpn host=localhost db=openvpn table=vpnuser usercolumn=name passwdcolumn=password [where=vpnuser.active=1] sqllog=0 crypt=2 sqllog=true logtable=logtable logmsgcolumn=msg logusercolumn=user logpidcolumn=pid loghostcolumn=host logrhostcolumn=rhost logtimecolumn=time
#使用testsaslauthd验证登录情况,如果出现下面的情况,说明我们的配置是正确的
[root@iosvpn ~]# saslauthd -a pam
[root@iosvpn ~]# testsaslauthd -u test1 -p test1 -s openvpn
0: OK "Success."

#3.安装Openvpn服务器auth-pam插件
yum install pam_devel -y
wget http://pkgs.fedoraproject.org/repo/pkgs/openvpn/openvpn-2.0.7.tar.gz/93528233f1f6d02fc18e2c00f82e0aca/openvpn-2.0.7.tar.gz
tar xf openvpn-2.0.7.tar.gz
cd openvpn-2.0.7/plugin/auth-pam/
make

cp openvpn-auth-pam.so /etc/openvpn/

#4.配置openvpn的server.conf
cat >>/etc/openvpn/server.conf<<EOF
script-security 3 system             #允许通过环境变量将密码传递给脚本
plugin /etc/openvpn/openvpn-auth-pam.so openvpn  #指定用户认证脚本
client-cert-not-required             #不使用客户端证书,使用密码对
username-as-common-name              #使用认证用户名,不使用证书的common name
EOF
#在service.conf最后一行添加

#5.客户端配置文件client.ovpn
client
dev tun
proto tcp
remote 192.168.0.11 1194
resolv-retry infinite
nobind
persist-key
persist-tun
ca ca.crt
;cert cyh.crt      #注释
;key cyh.key       #注释
tls-auth ta.key 1
cipher AES-256-CBC
comp-lzo
verb 3
auth-user-pass              #使用用户名密码登录openvpn服务器
#主要是注释crt和key路径,以及添加一行auth-user-pass

#6.重启openvpn
systemctl restart openvpn@server

#7.登录验证
查看vpn用户登录表
select from * logtable;

#8.禁用某个用户登录
只要把用户表里面的对应用户的active改为0,用户就无法登录
4.5.3 ldap插件
范例:
#1.安装openvpn-auth-ldap
yum install openvpn-auth-ldap -y

#2.修改ldap.conf认证配置
# 进入openvpn服务器认证配置文件夹
cd /etc/openvpn/auth/
# 备份默认配置文件
cp ldap.conf  ldap.conf.bak
# 开始修改配置,清空内容进行编辑
echo > ldap.conf
cat <<\EOF >/etc/openvpn/auth/ldap.conf
<LDAP>
 URL ldap://10.16.202.178:389
 BindDN "cn=admin,dc=ienglsh,dc=cn"
 Password  Ta9FIjsrlMXcWo
 Timeout 15
 TLSEnable no
 FollowReferrals no
</LDAP>
<LDAP>
    # AD服务器地址
    URL        ldap://192.168.xxx.xxx:389
    # 管理员DN
    BindDN  CN=Administrator,CN=Users,DC=XXX,DC=com
    # 管理员密码
    Password    Y%G@$%^F^#UGH
    # 超时时间
    Timeout        15
    # 是否允许启用TLS
    TLSEnable    no
    # 是否允许匿名
    FollowReferrals no

    ##开启TLS
    #TLSEnable    yes
    ## TLS CA证书文件
    #TLSCACertFile    /usr/local/etc/ssl/ca.pem
    ## TLS CA证书目录
    #TLSCACertDir    /etc/ssl/certs
    ## 客户证书和密钥
    ## 如果需要TLS客户端身份验证
    #TLSCertFile    /usr/local/etc/ssl/client-cert.pem
    #TLSKeyFile    /usr/local/etc/ssl/client-key.pem
    ## 密码套件,默认就好
    ## TLSCipherSuite    ALL:!ADH:@STRENGTH
</LDAP>

<Authorization>
    # 基础DN
    BaseDN        "OU=xxxx,DC=going-link,DC=com"
    # 用户搜索过滤条件 我们用uid并且有vpn属性作为AD用户登录名
    SearchFilter "(&(uid=%u)(ou=vpn)"
    # 需要组成员身份
    RequireGroup    false
    # 将非组成员添加到PF表(禁用)
    ##PFTable    ips_***_users
    #<Group>
    #    BaseDN        "ou=Groups,dc=example,dc=com"
    #    SearchFilter    "(|(cn=ops)(cn=artists))"
    #    MemberAttribute    uniqueMember
    ##   Add group members to a PF table (disabled)
    ##   PFTable    ips_***_eng
    #</Group>
</Authorization>
EOF

#3.配置openvpn的server.conf
cat >>/etc/openvpn/server.conf<<EOF
plugin /usr/lib64/openvpn/plugin/lib/openvpn-auth-ldap.so "/etc/openvpn/auth/ldap.conf cn=%u"
client-cert-not-required             #不使用客户端证书,使用密码对
username-as-common-name              #使用认证用户名,不使用证书的common name
EOF
#在service.conf最后一行添加

#4.客户端配置文件client.ovpn
client
dev tun
proto tcp
remote 192.168.0.11 1194
resolv-retry infinite
nobind
persist-key
persist-tun
ca ca.crt
;cert cyh.crt      #注释
;key cyh.key       #注释
tls-auth ta.key 1
cipher AES-256-CBC
comp-lzo
verb 3
auth-user-pass              #使用用户名密码登录openvpn服务器
#主要是注释crt和key路径,以及添加一行auth-user-pass

#5.重启openvpn
systemctl restart openvpn@server

#6.登录验证
#测试连接
#安装 openldap-clients
yum install -y openldap-clients
# 搜索实验 并输入密码
ldapsearch -x -W -D "CN=Administrator,CN=Users,DC=GOING-LINK,DC=com" -b "DC=GOING-LINK,DC=com" -h 192.168.1.62 -s one dn -LLL
#输入密码,能看到域内一些OU组织则成功
ldapsearch -x -W -D "CN=Administrator,CN=Users,DC=GOING-LINK,DC=com" -b "DC=going-link,DC=com" -h 192.168.1.62
ldapsearch -x -W -D "CN=Administrator,CN=Users,DC=GOING-LINK,DC=com" -b "OU=disabled,DC=going-link,DC=com" -h 192.168.1.62
4.5.4 GoogleAuthenticator认证插件
范例:LDAP+GoogleAuthenticator认证
插件下载地址: https://github.com/threerings/openvpn-auth-ldap https://github.com/evgeny-gridasov/openvpn-otp
#1.安装LDAP+GoogleAuthenticator
#安装LDAP插件
git clone https://github.com/threerings/openvpn-auth-ldap
cd openvpn-auth-ldap
yum install re2c libtool openldap openldap-devel openvpn-devel gcc-objc -y #安装依赖
./regen.sh
./configure --with-openldap=/usr/ --with-openvpn=/usr/ CFLAGS="-fPIC" OBJCFLAGS="-std=gnu11"
make
make install

#安装OTP插件
git clone https://github.com/evgeny-gridasov/openvpn-otp
cd openvpn-otp
yum install autoconf automake libtool* -y
./autogen.sh
./configure
make
make install

#插件位置
#/usr/local/lib/openvpn-auth-ldap.so
#/usr/local/lib/openvpn/openvpn-otp.so

#2.修改ldap.conf认证配置
# 进入openvpn服务器认证配置文件夹
cd /etc/openvpn/auth/
# 备份默认配置文件
cp ldap.conf  ldap.conf.bak
# 开始修改配置,清空内容进行编辑
echo > ldap.conf
cat <<\EOF >/etc/openvpn/auth/ldap.conf
<LDAP>
 URL ldap://10.16.202.178:389
 BindDN "cn=admin,dc=ienglish,dc=cn"
 Password  Ta9FIjsrlMXcWo
 Timeout 15
 TLSEnable no
 FollowReferrals no
</LDAP>
<LDAP>
    URL        ldap://192.168.xxx.xxx:389
    BindDN  CN=Administrator,CN=Users,DC=XXX,DC=com
    Password    Y%G@$%^F^#UGH
    Timeout        15
    TLSEnable    no
    FollowReferrals no
</LDAP>

<Authorization>
    BaseDN        "OU=xxxx,DC=going-link,DC=com"
    SearchFilter "(&(uid=%u)(ou=vpn)"
    RequireGroup    false

    PasswordIsCR   true

    #<Group>
    #    BaseDN        "ou=Groups,dc=example,dc=com"
    #    SearchFilter    "(|(cn=ops)(cn=artists))"
    #    MemberAttribute    uniqueMember
    #</Group>
</Authorization>
EOF

#3.配置openvpn的server.conf
cat >>/etc/openvpn/server.conf<<EOF
plugin /usr/local/lib/openvpn-auth-ldap.so  "/etc/openvpn/auth/ldap.conf cn=%u"
plugin /usr/local/lib/openvpn/openvpn-otp.so "password_is_cr=1 otp_secrets=/etc/openvpn/auth/otp-secrets"
client-cert-not-required             #不使用客户端证书,使用密码对
username-as-common-name              #使用认证用户名,不使用证书的common name
#调用验证脚本,生成OTP共享密钥
script-security 2
auth-user-pass-verify /etc/openvpn/scripts/check_cn_on_connect.sh via-env
#服务器端会定期检查认证情况,默认3600秒一小时,使用OTP的话尽量时间长一些,否则客户端需要重新输入用户名密码和OTP一次性密码。
reneg-sec 0
EOF
#在service.conf最后一行添加

#4.配置OTP相关内容/etc/openvpn/auth/otp-secrets
#格式:bob otp totp:sha1:base32:LJYHR64TUI7IL3RD::xxx *
#中间那串LJYHR64TUI7IL3RD就是密钥,熟悉GoogleAuthenticator原理的,可以直接生成专用字符串和二维码。用手机端扫一下就可以用了

#4.客户端配置文件client.ovpn
client
dev tun
proto tcp
remote 192.168.0.11 1194
resolv-retry infinite
nobind
persist-key
persist-tun
ca ca.crt
;cert cyh.crt      #注释
;key cyh.key       #注释
tls-auth ta.key 1
cipher AES-256-CBC
comp-lzo
verb 3
auth-user-pass              #使用用户名密码登录openvpn服务器
auth-nocache
static-challenge "Enter Google Authenticator Token" 1
#@弹出验证框,1表示明文显示,0表示密文显示

#5.重启openvpn
systemctl restart openvpn@server
5 扩展知识
5.1 OpenVPN Access Server
VPN Access Server 归属于 OpenVPN Solution,是官方推荐的VPN服务,它介于 可收费与免费之间。
其实这个就是把Openvpn Community开源版做成了更方便,更稳定,优化过了的 商业版。商业版有后台有基于Web的管理面板,也没有各种复杂和编译,而且只 提供2个免费测试的USER,如果需要更多则需要购买许可证5美元/用户。适合个 人自用,不适合多人用。
参考文档: https://openvpn.net/vpn-server-resources/finishing-configuration-of-access-server/
安装 OpenVpn Access Server
#注意:CentOS8 不支持下面包
[root@centos7 ~]#ll openvpn-as-*
-rw-r--r-- 1 root root     32742864 Apr 28 20:04 openvpn-as-2.8.3_f28d2eae-
CentOS7.x86_64.rpm
-rw-r--r-- 1 root root 130562200 Apr 28 20:03 openvpn-as-bundled-clients-8.rpm
[root@centos7 ~]#yum -y install openvpn-as-2.8.3_f28d2eae-CentOS7.x86_64.rpm
openvpn-as-bundled-clients-8.rpm
To reconfigure manually, use the /usr/local/openvpn_as/bin/ovpn-init tool.
+++++++++++++++++++++++++++++++++++++++++++++++
Access Server 2.8.3 has been successfully installed in /usr/local/openvpn_as
Configuration log file has been written to /usr/local/openvpn_as/init.log
Access Server Web UIs are available here:
Admin UI: https://10.0.0.17:943/admin
Client UI: https://10.0.0.17:943/
+++++++++++++++++++++++++++++++++++++++++++++++
Verifying : openvpn-as-2.8.3_f28d2eae-CentOS7.x86_64
                                                                        1/4
Verifying : MySQL-python-1.2.5-1.el7.x86_64
                                                                        2/4
Verifying : openvpn-as-bundled-clients-8-1.noarch
                                                                        3/4
Verifying : cyrus-sasl-2.1.26-23.el7.x86_64
                                                                        4/4
Installed:
openvpn-as.x86_64 0:2.8.3_f28d2eae-CentOS7                                     openvpn-as-
bundled-clients.noarch 0:8-1
Dependency Installed:
MySQL-python.x86_64 0:1.2.5-1.el7                                                 cyrus-sasl.x86_64
0:2.1.26-23.el7
Complete!
[root@centos7 ~]#getent passwd openvpn
openvpn:x:1002:1002::/home/openvpn:/sbin/nologin
[root@centos7 ~]#passwd openvpn
Changing password for user openvpn.
New password:
BAD PASSWORD: The password is shorter than 8 characters
Retype new password:
passwd: all authentication tokens updated successfully.
#安装包后openvpnas.service 自动启动
[root@centos7 ~]#systemctl status openvpnas.service


#查看打开的相关端口
[root@centos7 ~]#ss -ntlp
State         Recv-Q Send-Q                         Local Address:Port             Peer Address:Port

LISTEN         0             50 127.0.0.1:909                     *:*                                     users:
(("python2",pid=1427,fd=15))
LISTEN         0             50                 *:943                     *:*                                     users:
(("python2",pid=1427,fd=8))
LISTEN         0             128             *:22                     *:*                                     users:
(("sshd",pid=827,fd=3))
LISTEN         0             100127.0.0.1:25                     *:*                                     users:
(("master",pid=962,fd=13))
LISTEN         0             1                 *:443                     *:*                                     users:
(("openvpn-openssl",pid=1481,fd=5))
LISTEN         0             50 127.0.0.1:904                     *:*                                     users:
(("python2",pid=1427,fd=10))
LISTEN         0             50 127.0.0.1:905                     *:*                                     users:
(("python2",pid=1427,fd=11))
LISTEN         0             50 127.0.0.1:906                     *:*                                     users:
(("python2",pid=1427,fd=12))
LISTEN         0             50 127.0.0.1:907                     *:*                                     users:
(("python2",pid=1427,fd=13))
LISTEN         0             50 127.0.0.1:908                     *:*                                     users:
(("python2",pid=1427,fd=14))
LISTEN         0             128         [::]:22                 [::]:*                                     users:
(("sshd",pid=827,fd=4))
LISTEN         0             100     [::1]:25                 [::]:*                                     users:
(("master",pid=962,fd=14))
登录服务器Admin UI 进行管理
https://openvpn-server:943/admin

输入用户openvpn和上面设置的密码可以登录

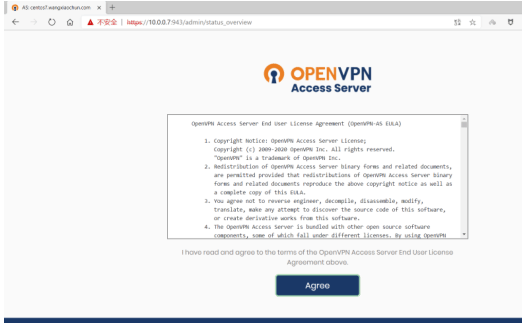
登录成功
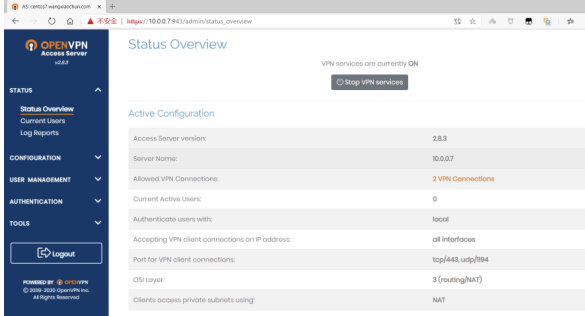
从 Client UI登录客户端连接地址下载相关文件
https://openvpn-server:943/

选择下载相应的软件版本安装
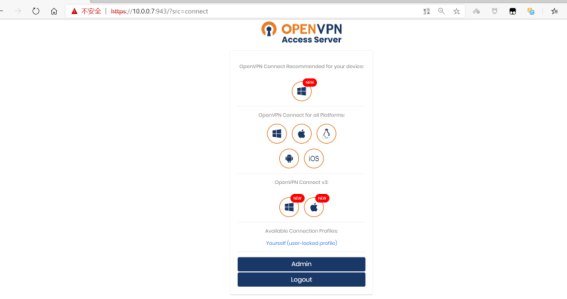
下载软件完成

安装客户端软件
安装完成

5.1.5 运行软件并登录
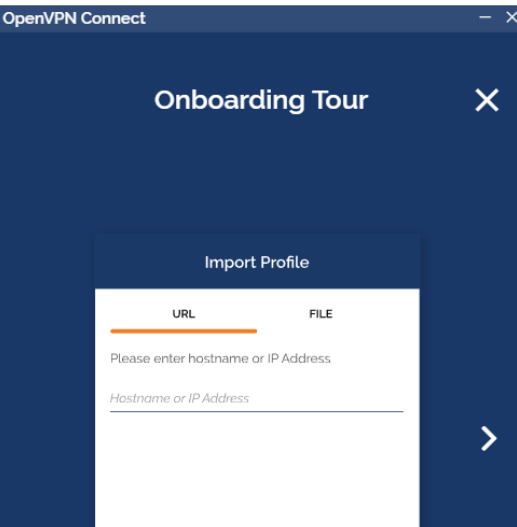


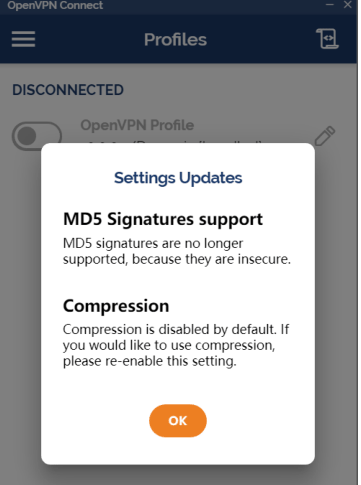
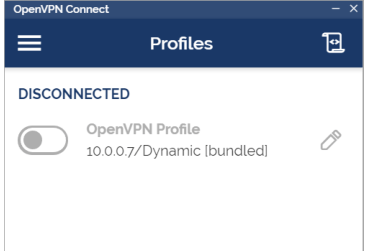
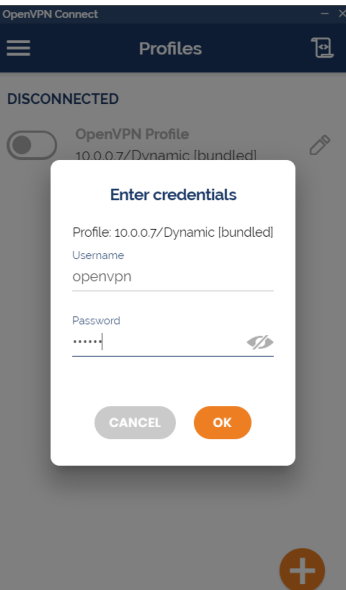
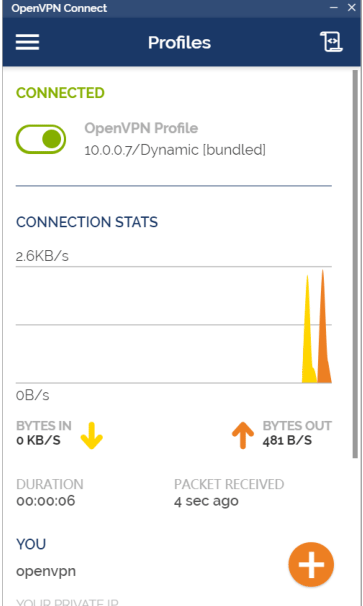
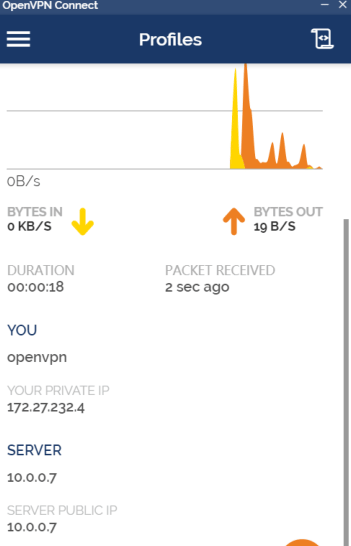

验证登录
客户端查看登录
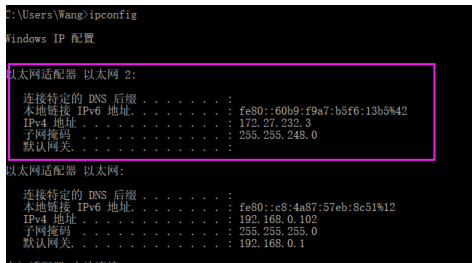
服务器查看日志
[root@centos7 ~]#tail /var/log/openvpnas.log -f
5.2 docker 运行OpenVPN Access Server
5.3 一键安装
安装openvpn和ldap认证
#1.安装openvpn和ldap认证
curl -O https://raw.githubusercontent.com/angristan/openvpn-install/master/openvpn-install.sh
chmod +x openvpn-install.sh
AUTO_INSTALL=y ./openvpn-install.sh
#安装过程
#确定服务器 IP 后按 Enter
#使用 IPv6 ? 填 n (否) 后按 Enter
#OpenVPN port ,选 1) default 1194 后按 Enter
#传输协定类 UDP / TCP,选 1 UDP 后按 Enter
#选 DNS 服务器,一般都会选 3.CloudFalre 或者9. Google,选完后按 Enter
#连线数据压缩,不建议使用,填 n 后按 Enter
#自定加密方式,如果不是高手,就填 n 后按 Enter,高手的话可以自己选 AES 加密长度及方式。
#Press any key to countinue … 按 Enter后开始安装
#运行完成后会要求你加入第一个用户 ( Client name: ),只可以填英文字串,如 edwardclient填完后按 Enter
#是否用密码加密金钥 ? 一般我会选 2 ,自己输入密码,填完整个安装过程就完成了。

yum install openvpn-auth-ldap -y

#2.配置ldap和openvpn服务端
#配置ldap
cd /etc/openvpn/auth/
cp ldap.conf ldap.conf.old
cat <<\EOF > /etc/openvpn/auth/ldap.conf
<LDAP>
 URL ldap://10.16.202.178:389
 BindDN "cn=admin,dc=ienglish,dc=cn"
 Password  Ta9FIjsrlMXcWo
 Timeout 15
 TLSEnable no
 FollowReferrals no
</LDAP>


<Authorization>
  BaseDN "ou=user,dc=iXX,dc=cn"
  SearchFilter "(&(uid=%u)(ou=vpn))"
  RequireGroup false
#  RequireGroup true
#  <Group>
#    BaseDN "ou=group,dc=iXX,dc=cn"
#    SearchFilter    "cn=ops"
#    MemberAttribute member
#  </Group>
</Authorization>
EOF

#配置openvpn服务端
cat <<\EOF> /etc/openvpn/server.conf
port 1194
proto tcp
dev tun
user nobody
group nobody
keepalive 10 120
topology subnet
server 10.251.254.0 255.255.255.0
push "dhcp-option DNS 114.114.114.114"
push "dhcp-option DNS 223.5.5.5"
#push "redirect-gateway def1 bypass-dhcp"   #启用后,客户端所有流量都将通过VPN服务器
push "route 10.64.0.0 255.255.0.0"          #给客户端生成的到达服务器后面网段的静态路由,下一跳为openvpn服务器的10.251.254.1
push "route 172.28.0.0 255.255.0.0"
push "route 172.17.0.0 255.255.0.0"
push "route 10.16.0.0 255.255.0.0"
push "route 10.0.0.0 255.255.0.0"
dh none
ecdh-curve prime256v1
tls-crypt tls-crypt.key 0
crl-verify crl.pem
ca ca.crt
cert server_toHbMLW61cV2DLVL.crt
key server_toHbMLW61cV2DLVL.key
auth SHA256
cipher AES-128-GCM
ncp-ciphers AES-128-GCM
tls-server
tls-version-min 1.2
tls-cipher TLS-ECDHE-ECDSA-WITH-AES-128-GCM-SHA256
status /var/log/openvpn/status.log
verb 3
log-append  /var/log/openvpn.log
log /var/log/openvpn.log
plugin /usr/lib64/openvpn/plugin/lib/openvpn-auth-ldap.so "/etc/openvpn/auth/ldap.conf cn=%u"
verify-client-cert
#client-cert-not-required
reneg-sec 0                # 关闭默认的 3600s 客户端连接断开时间
duplicate-cn               # 允许多用户登录
management 127.0.0.1 5555  #本地管理
EOF

#3.启动服务
systemctl restart openvpn@server

#4. 客户端配置
cat << \EOF >clientVPN.ovpn
client
proto tcp
remote ovpn.ops.ienglish.cn 1194
dev tun
resolv-retry infinite
nobind
persist-key
persist-tun
remote-cert-tls server
verify-x509-name server_toHbMLW61cV2DLVL name
auth SHA256
auth-nocache
cipher AES-128-GCM
tls-client
tls-version-min 1.2
tls-cipher TLS-ECDHE-ECDSA-WITH-AES-128-GCM-SHA256
verb 3
reneg-sec 0
auth-user-pass
<ca>
-----BEGIN CERTIFICATE-----
MIIBwDCCAWegAwIBAgIJAIYfesO4nOfkMAoGCCqGSM49BAMCMB4xHDAaBgNVBAMM
E2NuX3pna3ZxMjRPaEw3cnlNNVAwHhcNMjAwNDA5MDUxMDE0WhcNMzAwNDA3MDUx
MDE0WjAeMRwwGgYDVQQDDBNjbl96Z2t2cTI0T2hMN3J5TTVQMFkwEwYHKoZIzj0C
AQYIKoZIzj0DAQcDQgAEfwBtwu30mVlfohUIZieE5wweha06xhRENKZj4fubzXK0
naowO/3RnDOQ65uprrLy4YgcqRoKjawDChkPkjKfBKOBjTCBijAdBgNVHQ4EFgQU
FK7Drlw6CT95EJrEdOJWPok3r+IwTgYDVR0jBEcwRYAUFK7Drlw6CT95EJrEdOJW
Pok3r+KhIqQgMB4xHDAaBgNVBAMME2NuX3pna3ZxMjRPaEw3cnlNNVCCCQCGH3rD
uJzn5DAMBgNVHRMEBTADAQH/MAsGA1UdDwQEAwIBBjAKBggqhkjOPQQDAgNHADBE
AiBBQSIdcKeRqTSZY1MN+gE9vv5+WquTh+7rQl3YcTrGNgIgNs5qOrZLEtzPNbIv
Fp4Vmm4tBjxiUWLoo0RvSy9IEN8=
-----END CERTIFICATE-----
</ca>
<cert>
-----BEGIN CERTIFICATE-----
MIIBzTCCAXSgAwIBAgIRAIT/nyBpr3W0bCxec3ulPwYwCgYIKoZIzj0EAwIwHjEc
MBoGA1UEAwwTY25femdrdnEyNE9oTDdyeU01UDAeFw0yMDA0MDkwNTEwMTVaFw0y
MzAzMjUwNTEwMTVaMBExDzANBgNVBAMMBmNsaWVudDBZMBMGByqGSM49AgEGCCqG
SM49AwEHA0IABI/r4PhlmQ1vxatAdnutCajU3LSj/xykVt1AK1H2Ngt0njqQnEE8
V/Qt2b9hu9PmfAWOD/XZhib2HFUtS+tU3vGjgZ8wgZwwCQYDVR0TBAIwADAdBgNV
HQ4EFgQUZxuE70ggpYIW/Ljshtt/H8UNZ9IwTgYDVR0jBEcwRYAUFK7Drlw6CT95
EJrEdOJWPok3r+KhIqQgMB4xHDAaBgNVBAMME2NuX3pna3ZxMjRPaEw3cnlNNVCC
CQCGH3rDuJzn5DATBgNVHSUEDDAKBggrBgEFBQcDAjALBgNVHQ8EBAMCB4AwCgYI
KoZIzj0EAwIDRwAwRAIgV++5cHLwZDVif7xn3+x4kbuj5MP5T58Zl2c1gC5mZcMC
IHQ5P4QwuN8hWhSn9jcHnSYCGgCBVP5UOuhBc/M6k18o
-----END CERTIFICATE-----
</cert>
<key>
-----BEGIN PRIVATE KEY-----
MIGHAgEAMBMGByqGSM49AgEGCCqGSM49AwEHBG0wawIBAQQg8o7s/two90o8jSJt
sKTxji0iCIN6wtPbRkdPLH3FgC+hRANCAASP6+D4ZZkNb8WrQHZ7rQmo1Ny0o/8c
pFbdQCtR9jYLdJ46kJxBPFf0Ldm/YbvT5nwFjg/12YYm9hxVLUvrVN7x
-----END PRIVATE KEY-----
</key>
<tls-crypt>
#
# 2048 bit OpenVPN static key
#
-----BEGIN OpenVPN Static key V1-----
fb00ed6e53ba1f408edfa674bab0e919
2018051046e9e6c1e84af92200b81d81
54f3a59ce9e8a4c5d4bca63b9272ceaa
c256452e668384b918608bb553d2c37e
575327ca3d4cab43ad28cd51ff31faa7
476d205dd524002d3a26192f5cb1f428
e8ba7e63ae775d1276ff8b0d36d0d385
9c1e6ce97ffefceb5dd90187c380eb46
3ff455a10cb4c4269a3bda593f065357
20a8df152efc030aa39e134f753c8071
ca40a332fd4d8a0e9c18b62ef39b7d08
93815058eb7132131ac5a65ab7b1bbd3
252b7cd7e705fb08e09388a157610632
7e045f666ee707ffacd043b468b96523
4eeb4a8bf3c9d1ca0e32b123e893431e
3cd6d4df92a400eb8376078d8dd2b089
-----END OpenVPN Static key V1-----
</tls-crypt>
EOF

#查询
ldapsearch   -x -D "cn=admin,dc=iXX,dc=cn"  -w Ta9FIjsrlMXcWo -b "ou=user,dc=iXX,dc=cn" ou=vpn |grep uid


iptables -t nat -A POSTROUTING -s 10.8.0.0/24 -o eth0 -j MASQUERADE
iptables -A INPUT -i tun0 -j ACCEPT
iptables -A FORWARD -i eth0 -o tun0 -j ACCEPT
iptables -A FORWARD -i tun0 -o eth0 -j ACCEPT
iptables -A INPUT -i eth0 -p udp --dport 1194 -j ACCEPT
5.4 监控
openvpn-monitor
openvpn-monitor是一个简单的python程序,用于生成html,显示OpenVPN服务器的状态,包括所有当前连接。
Gitis当前可用的源代码:
https://github.com/furlongm/openvpn-monitor
安装
#1.安装监控工具
yum install -y epel-release
virtualenv + pip + gunicorn
# apt-get install python-virtualenv geoip-database-extra geoipupdate      # (debian/ubuntu)
# yum install python-virtualenv GeoIP-update geolite2-city python2-geoip2 # (centos/rhel)
mkdir /data/openvpn-monitor
cd /data/openvpn-monitor
virtualenv .
. bin/activate
pip install --upgrade pip
pip install openvpn-monitor gunicorn
gunicorn openvpn-monitor -b 0.0.0.0:80


# cat /data/openvpn-monitor/openvpn-monitor.conf
[openvpn-monitor]
site=Top_Learning
#logo=logo.jpg
#latitude=40.72
#longitude=-74
maps=False
#geoip_data=/var/lib/GeoIP/GeoLite2-City.mmdb
geoip_data=/data/openvpn-monitor/GeoIP/GeoLite2-City.mmdb
datetime_format=%d/%m/%Y %H:%M:%S

[VPN1]
host=localhost
port=5555
name=TOPE-VPN
show_disconnect=False

#2.配置openvpn的server.conf
cat >>/etc/openvpn/server.conf<<EOF
management 127.0.0.1 5555  #本地管理
EOF
#在service.conf最后一行添加

#3.重启openvpn
systemctl restart openvpn@server
访问对应80端口
